
review of MGEX Unicorn Gundam Ver.Ka following the previous Unicorn Mode edition
This is a review of MGEX Unicorn Gundam Ver.Ka following the previous Unicorn Mode edition. This time is the Destroy mode edition. I would like to mainly review the details of Destroy mode and light emission.
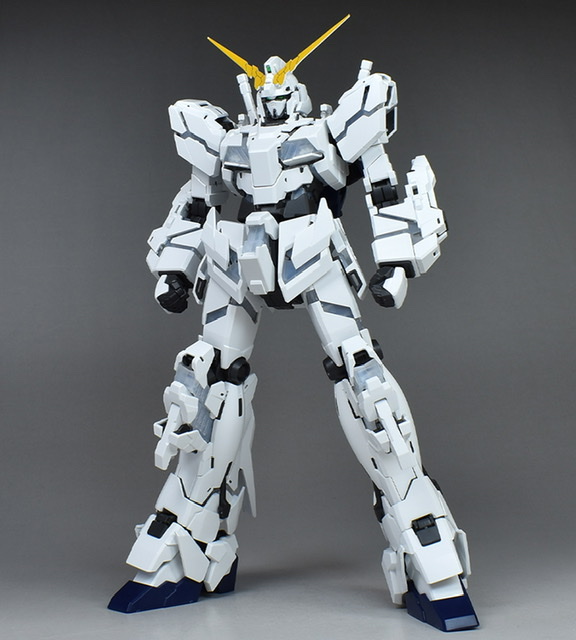
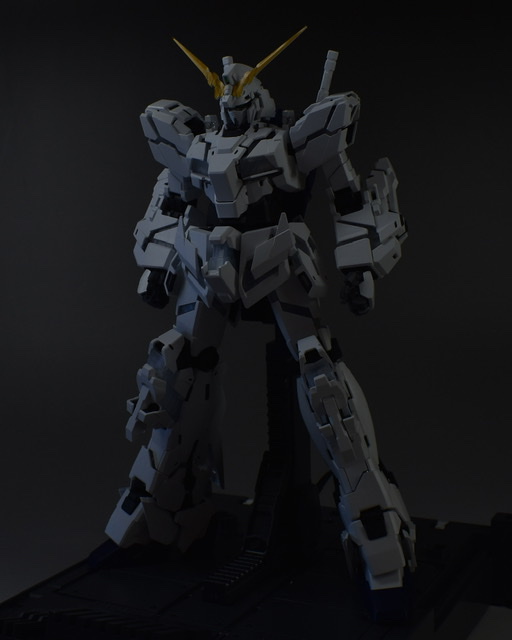
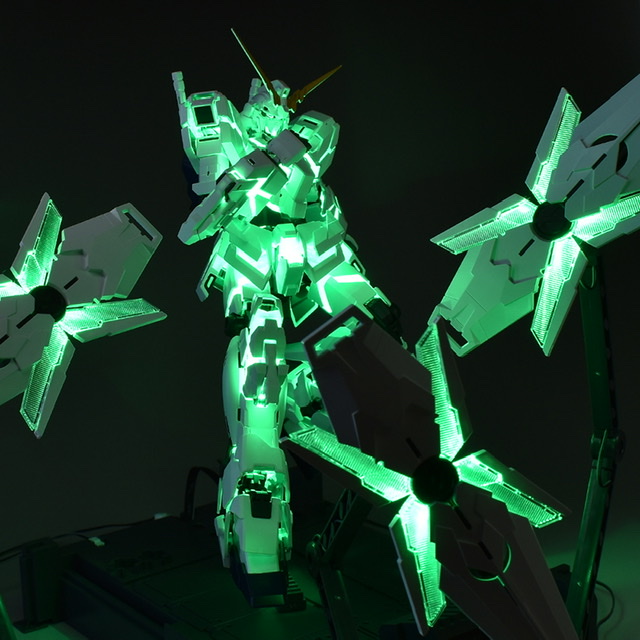
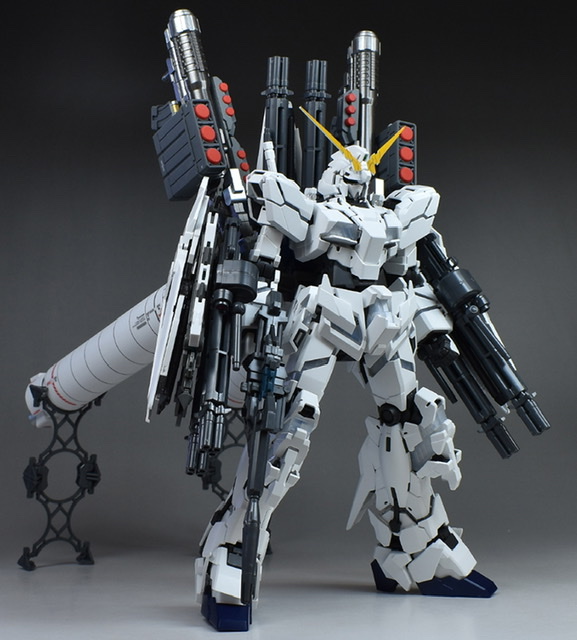
Being a kit that reproduces light emission using LEDs, the psycho frame is a clear white molding color that is conscious of light emission. This makes the whole body white-based. It feels a little unsatisfactory, but it has a deactive feeling and you can enjoy the vividness when the LED emits light.
The overall height has increased slightly from the unicorn mode, but even after the armor is deployed, there is no specific gravity on one side and the independence is stable.
Let’s take a look at each part while comparing it with the Destroy mode of the old kit.
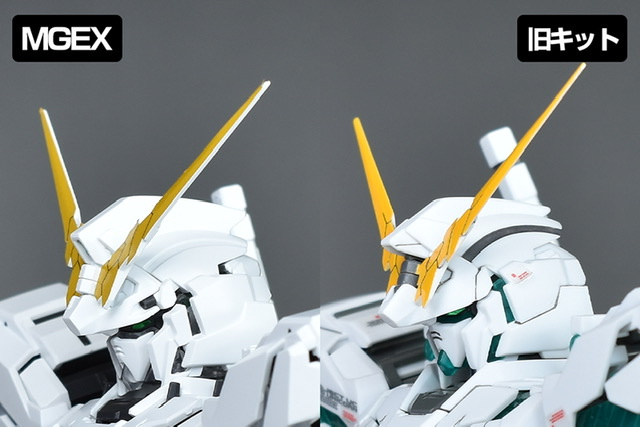
Compare the head with the old kit. For a well-organized construction with fine balance adjustments such as extension of the comb.
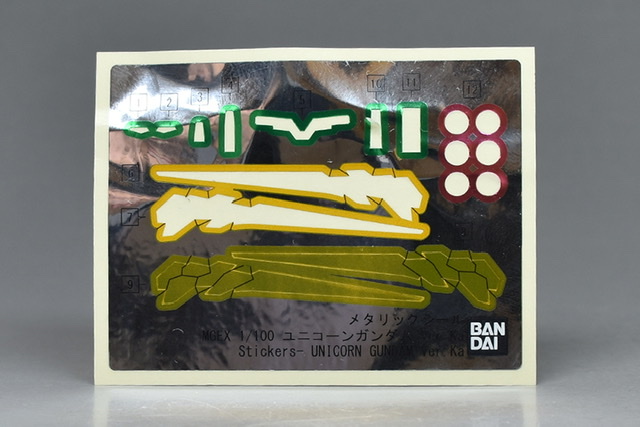
The antenna is color-coded with a sticker, but you can choose between gold and yellow. This time I’m pasting yellow.
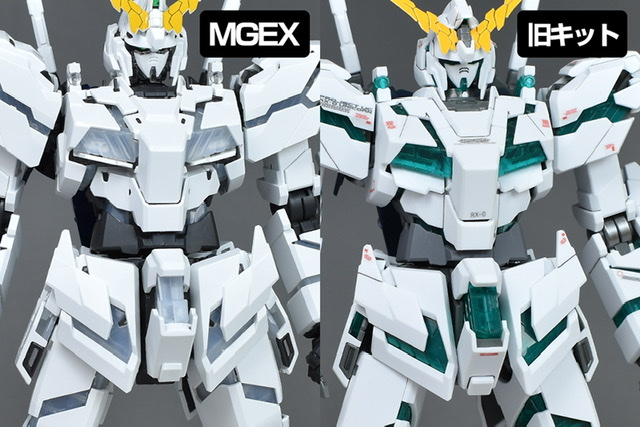
Compare the fuselage with the old kit. The psycho frame is not colored, so it feels a little unsatisfactory, but it has a good balance with the head and is well-balanced overall. The extension of the abdomen may be one of the factors that improved the proportion balance. The old kit seems to have a little tightness around the neck.
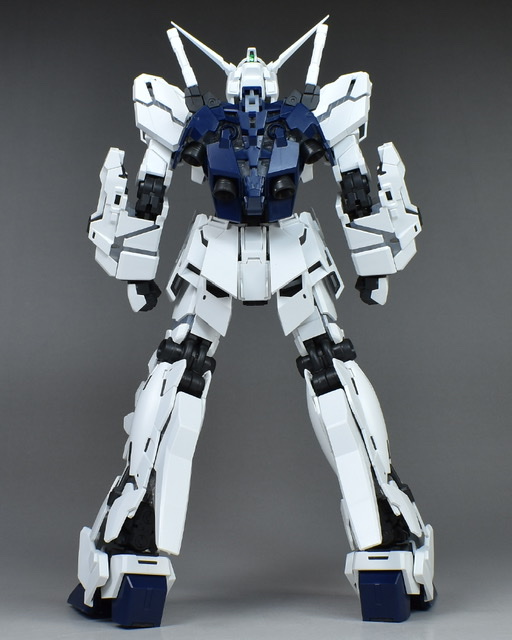
The back is also compared with the old kit. Impression that the width came out to the left and right. The shoulder sensor is also color-coded with parts up to the back.
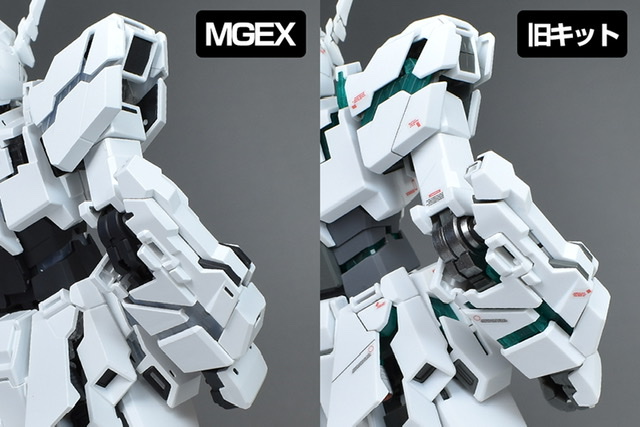
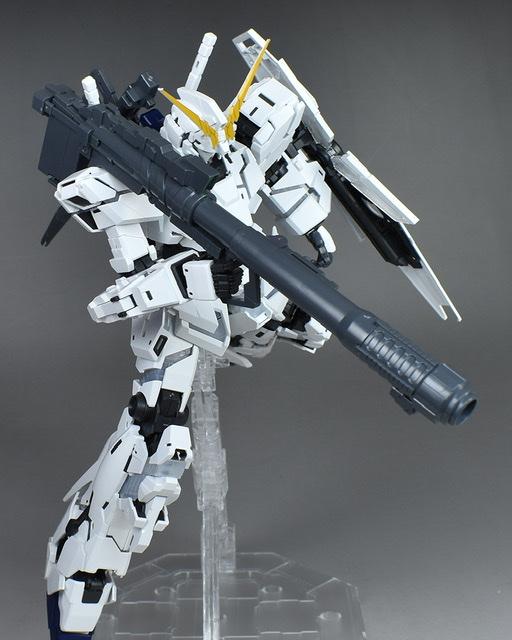
Compare the arm with the old kit. In the old kit, the width of the psycho frame such as shoulder armor varied, but in MGEX, the width of each part is almost constant. The armor on the side of the forearm, which was easily closed in the old kit, has a high fixing strength because it has a stopper, so it cannot be closed easily.
Forearm beam tonfa, which was not fully deployed in unicorn mode, can now be fully deployed.
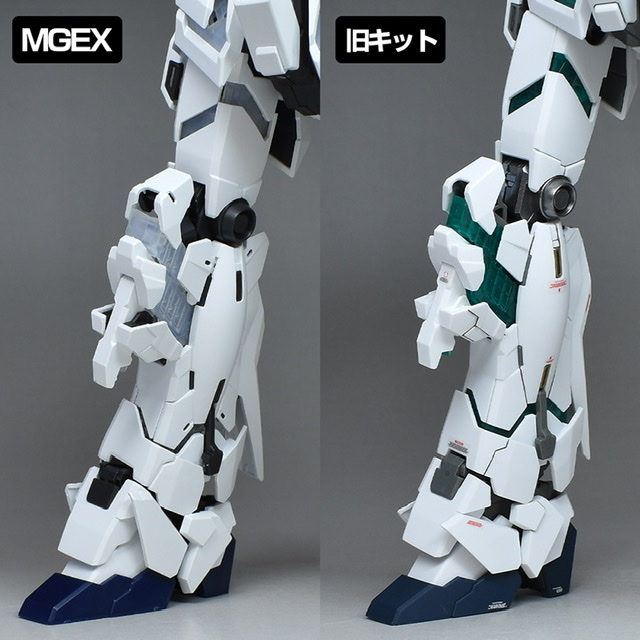
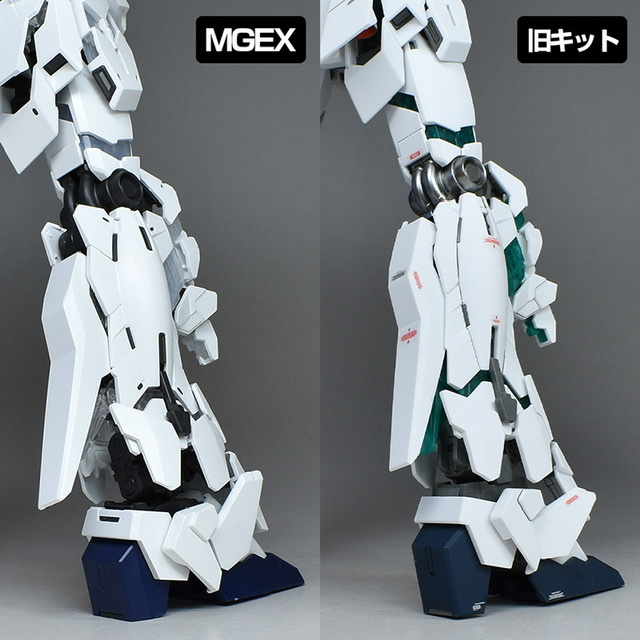
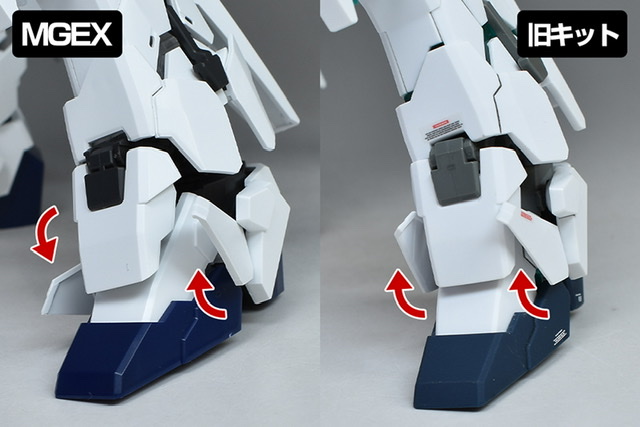
Compare the legs with the old kit. In the old kit, the legs including the thighs were long, which gave the impression that the overall proportion balance was uncomfortable, but in MGEX, the length is adjusted to match the proportions, making it a little more massive.
The left and right armor of the sole part was designed to move independently on the left and right in the old kit, but in MGEX it is individually connected with a ball joint so that it can move freely independently.
Impression that the backpack does not feel so different. I wonder if MGEX is a little bigger.
Compared side by side with the old kit (MG Full Armor Unicorn Gundam Ver.Ka). I didn’t feel that much difference in proportions in Unicorn mode, but the difference is noticeable in Destroy mode. While the old kit has a long leg, MGEX has a much better overall balance and proportions.
Compared with RG Unicorn Gundam (Destroy Mode) in size. RG has the same neat proportions as MGEX. The shoulder armor has some characteristics.
Then easily transform from Unicorn mode to Destroy mode. The transformation mechanism is almost the same as the old kit (MG Unicorn Gundam Ver.Ka), but the transformation of the head is slightly different, and there is also a lock mechanism that does not close the unfolding part in other parts.
For the transformation of the head, remove the left and right armor and deploy the met part. Pull out the face in Destroy mode to store the face in Unicorn mode.
The Met part seems to be difficult to close tightly when the unicorn mode face cannot be stored well. I think it will work if the shape of the clear parts on the side and the shape of the met part are matched. When closed, deploy the antenna and combine the left and right armor in the Destroy mode orientation.
The chest opens to the left and right, and the air intake armor and shoulder sensors are deployed. Remove the stopper on the back of the abdomen and extend it vertically. It seems that the armor of the air intake does not open as much as the old kit.
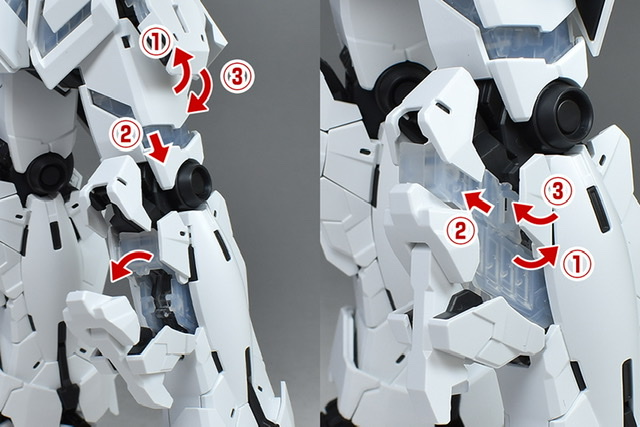
The forearm simply stretches the wrist and outer armor outwards. The shoulder armor is deployed by rotating the duct on the side. Pull out the front and rear triangular armor to expose the psycho frame.
As with the old kit, the waist circumference is also exposed by exposing the central psycho frame, and the armor of each part armor is simply slid and deployed. The central part has high movable strength, so it does not seem to close as easily as the old kit. Side armor etc. have high slide strength, so it is better to remove it once and then deploy it.
Transformation of the legs.
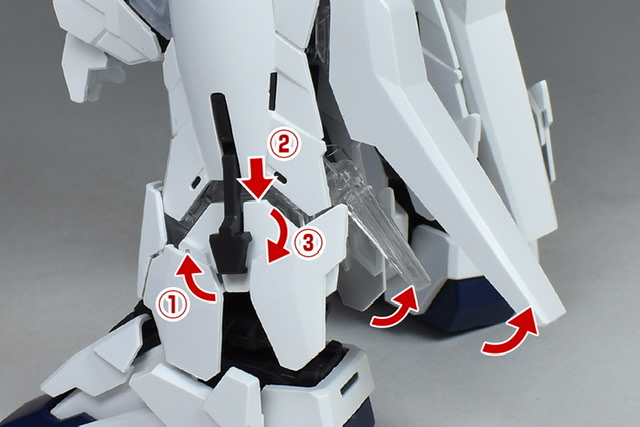
The thighs are the same as the old kit, open the outer armor and extend vertically to return the armor. Open the armor of the knee and change the shape of each part. Pull out the psycho frame from the inside and assemble by changing the angle of the armor parts of the knee. The armor on the left and right of the knee is also fixed by inserting a dowel into the pulled out psycho frame. If the dowel cannot be inserted, the psycho frame is not fully pulled out. Since each part is fixed with a click, it can be handled without closing naturally.
Deploy the rear thruster cover and clear cover parts. The sneak opens the left and right stoppers and extends it to expose the psycho frame.
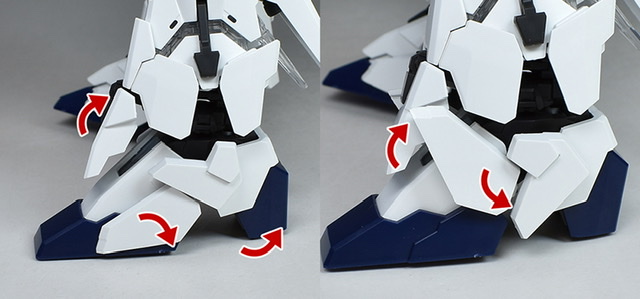
The sole part has a high heel type by moving the instep, heel and toes. Also change the angle of the side armor.
The backpack is transformed in the same way as the old kit, but the strength of the moving parts makes it easy to handle without closing.
Next, let’s look at the range of motion.
As for the lower body, although the old kit bends deeply in the knees, there are some unstable parts such as the length of the legs or the standing knees. MGEX, on the other hand, can maintain a clean posture. The old kit was a little difficult to handle because each part would close if you played with it.
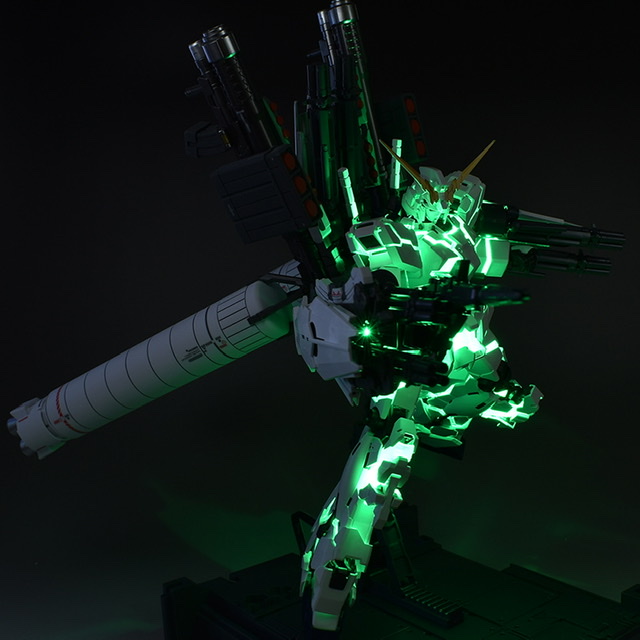
(1) Turn on the power button and press the mode switch once, and the main camera and head psycho frame will emit green light. It turns off automatically in about 3 minutes.
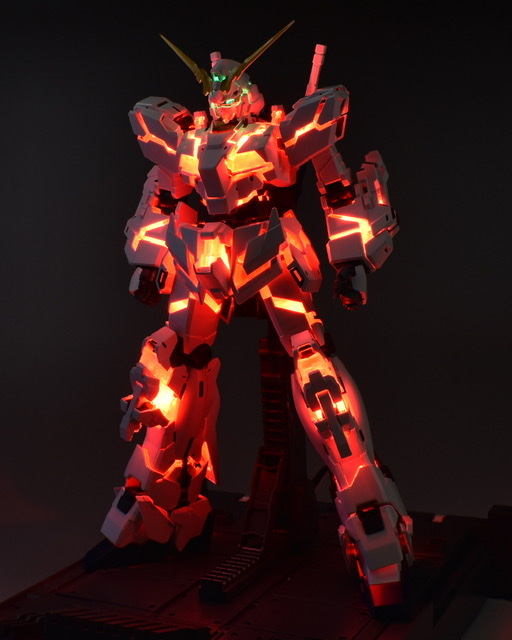
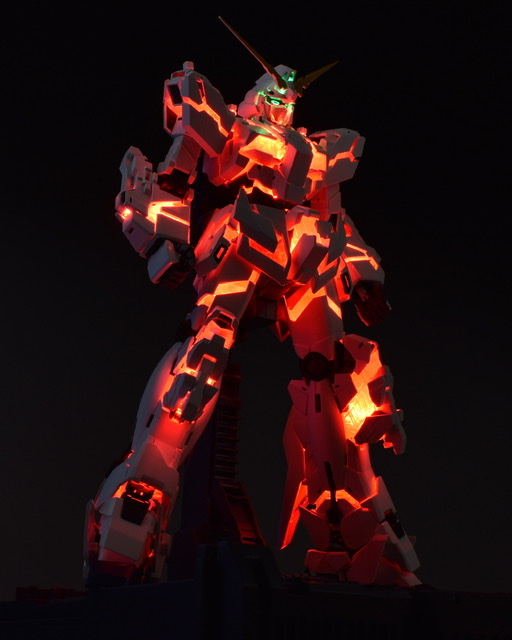
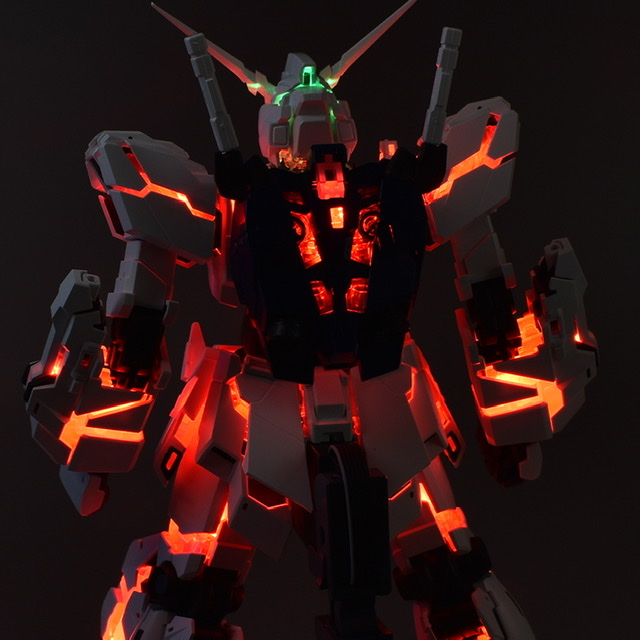
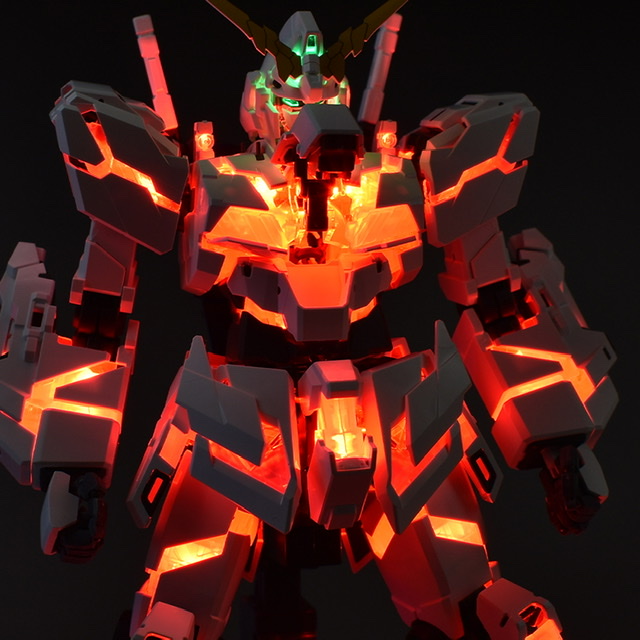
② When you press the mode switch again, the main camera lights up in green ⇒ The whole body lights up in red and the psycho frame lights up in red. It turns off automatically in about 5 minutes. (The LED on the shield does not emit light.)
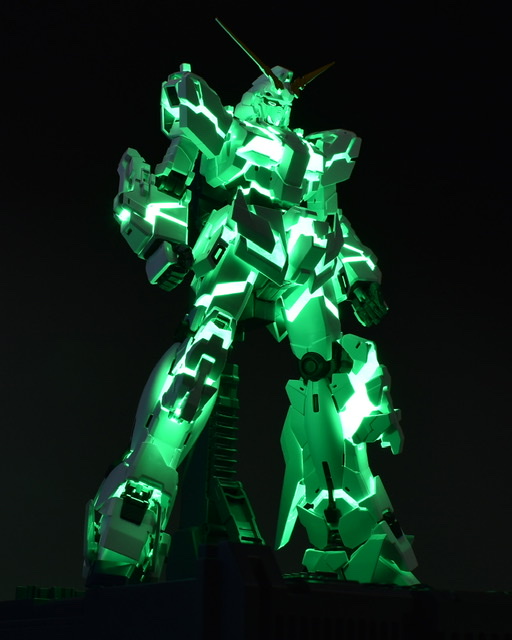
③ If you press the mode switch once more, the main camera lights up in green ⇒ The LED on the whole body and shield lights up in green, and the psycho frame lights up in green. This also turns off automatically in about 5 minutes.
④ If you press the mode switch once more, the effects of ② and ③ will be repeated. It turns off automatically in about 5 minutes.
⑤ Press the mode switch once to turn it off.
⑥ Press the mode switch once to return to the effect of ①.
Since the area of the psycho frame is wider than the unicorn mode, it emits light quite vividly.
The back, including the backpack, also glows brightly.
The inside of the cockpit glows like a flame!!!!!
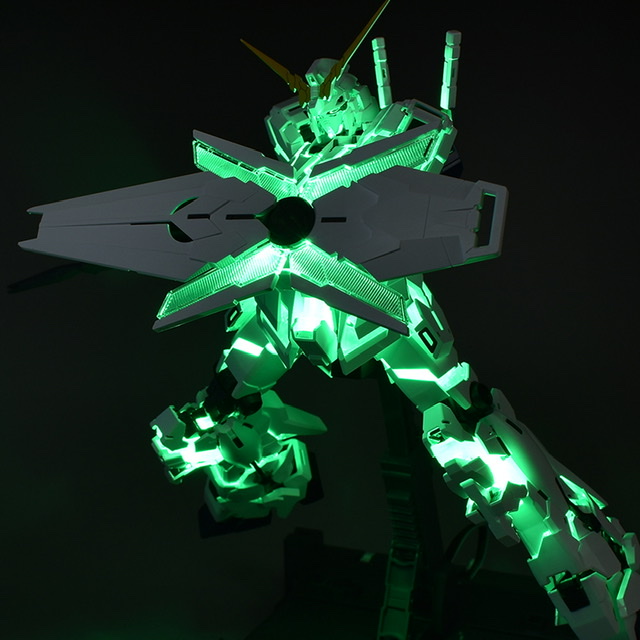
Even in Destroy mode, the shield will emit light without any problem.
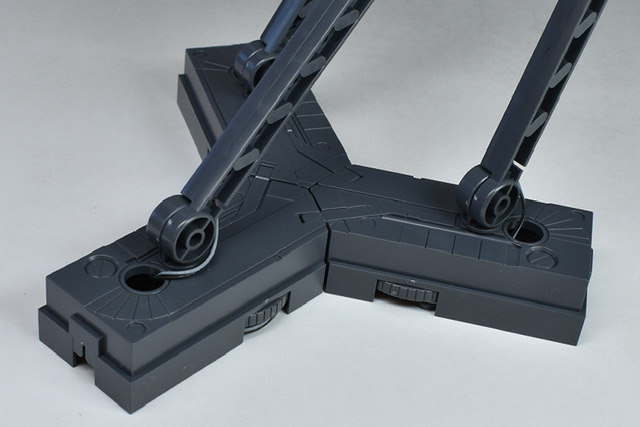
Stand for shield. It is a well-built stand that combines two columns and has a small pedestal at the bottom.
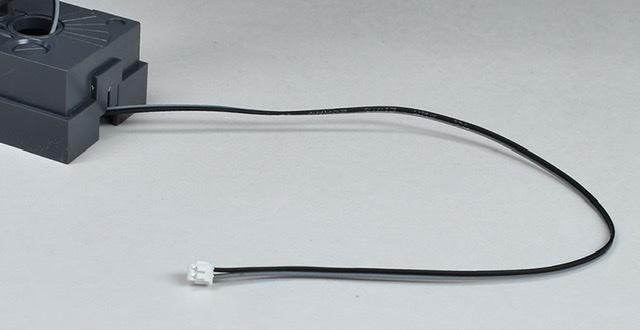
A mold is also formed on the pedestal part, and a reel for winding the LED cord is formed on the back side.
You can adjust the length of the cord to your liking, so you can display it without cluttering or tangling the cord.
The stanchions can be bent into a dogleg shape and the base can be rotated.
The shield connection port is a left and right sandwich type, but the seams are stepped down and molded. The LED cord is passed through the column so that it crawls in a zigzag pattern.
It is possible to connect 3 pedestals.
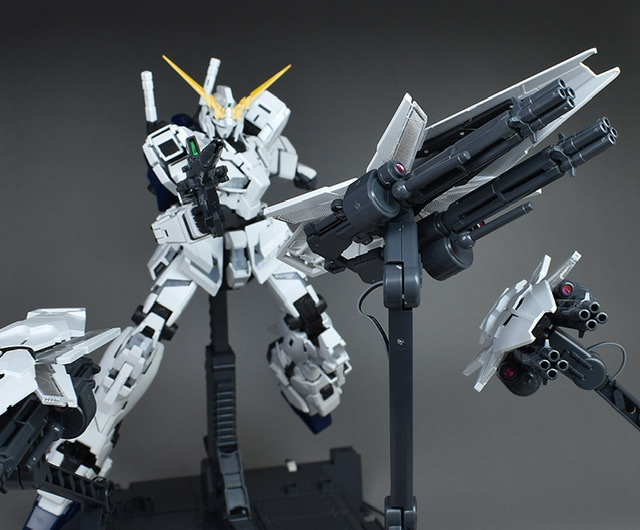
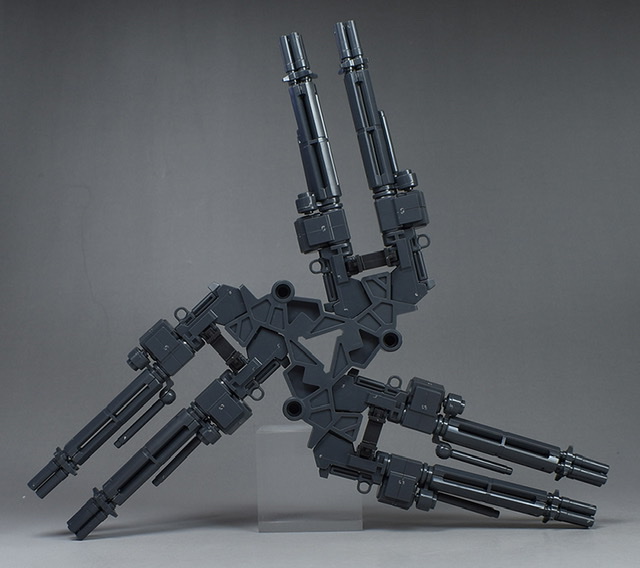
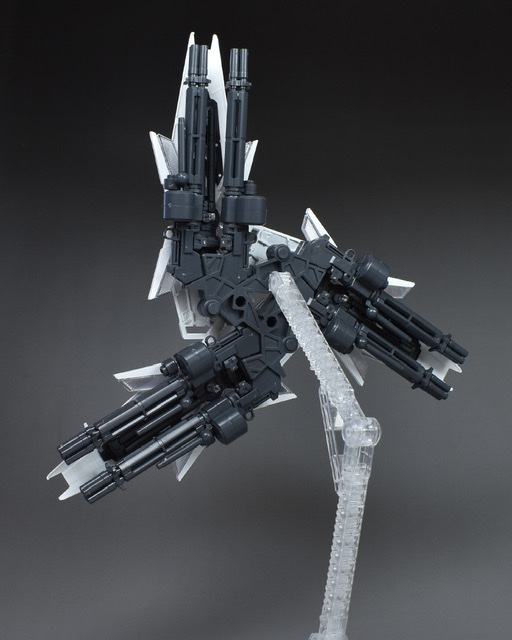
Furthermore, by equipping two beam gatling guns, the shield bit can be strengthened. Please note that if you strengthen it, the shield stand will be easily loaded and will easily fall over.
By combining the attached base parts and 3 double beam gatling guns in a windmill shape and attaching a shield, you can reproduce the shield triple defense.
The shield triple defense can also be displayed using a normal action base.
You can enjoy the reproduction of the scene in the play and the unique production by the shield triple defense.
Since the shape of the backpack is quite similar, it was possible to equip the MG full armor unit as well.
Although the specific weight is applied to the rear, it is possible to display it in a floating state.
This is the review of Destroy mode following Unicorn mode. In the old kit, the armor deployed at the time of handling was easy to close, but in this MGEX, it does not close naturally due to the lock mechanism and high movable strength, making it a stable and easy-to-use kit. The LED emission that overflows from the psycho frame is also colorful, and you will be impressed by its beauty.
There were few places to worry about, but if you use a shield bit equipped with two beam gatling guns, it will easily fall down due to its weight, so be careful about that point.
Both Unicorn mode and Destroy mode are three-dimensionalized with stable proportions that do not make you feel uncomfortable, and it seems that you can customize it depending on the combination, such as being able to attach a full armor unit, so it seems that you can play with abundant gimmicks. Of course, the light emission is also vivid, so it was a highly complete kit that was conscious of “extreme expression”, which seems to be useful as a display item.


Images gundamsblog net