もりそば重工’s Remodeling, mixing build HGUC Nightingale Matte Candy Finish: many images, credits, full info
From the Modeler:
This is my first attempt at mixing. The kit I used was HG Kshatriya. In addition to the binder, i also cut out exterior parts and frames and use them in various places.
The background has been changed from black to white, and the lighting has been changed to daylight white. Not only the colors but also the textures appear to have changed, giving me a sense of the depth of the photography. This kind of study looks fun.
The first thing I worried about when making this kit was how to modify the simple legs. This time, i added armor, changed the shape, and cut out the exterior with the image of RG Sazabi. The vernier panel has been renovated so that it can be moved at three points and slide storage.
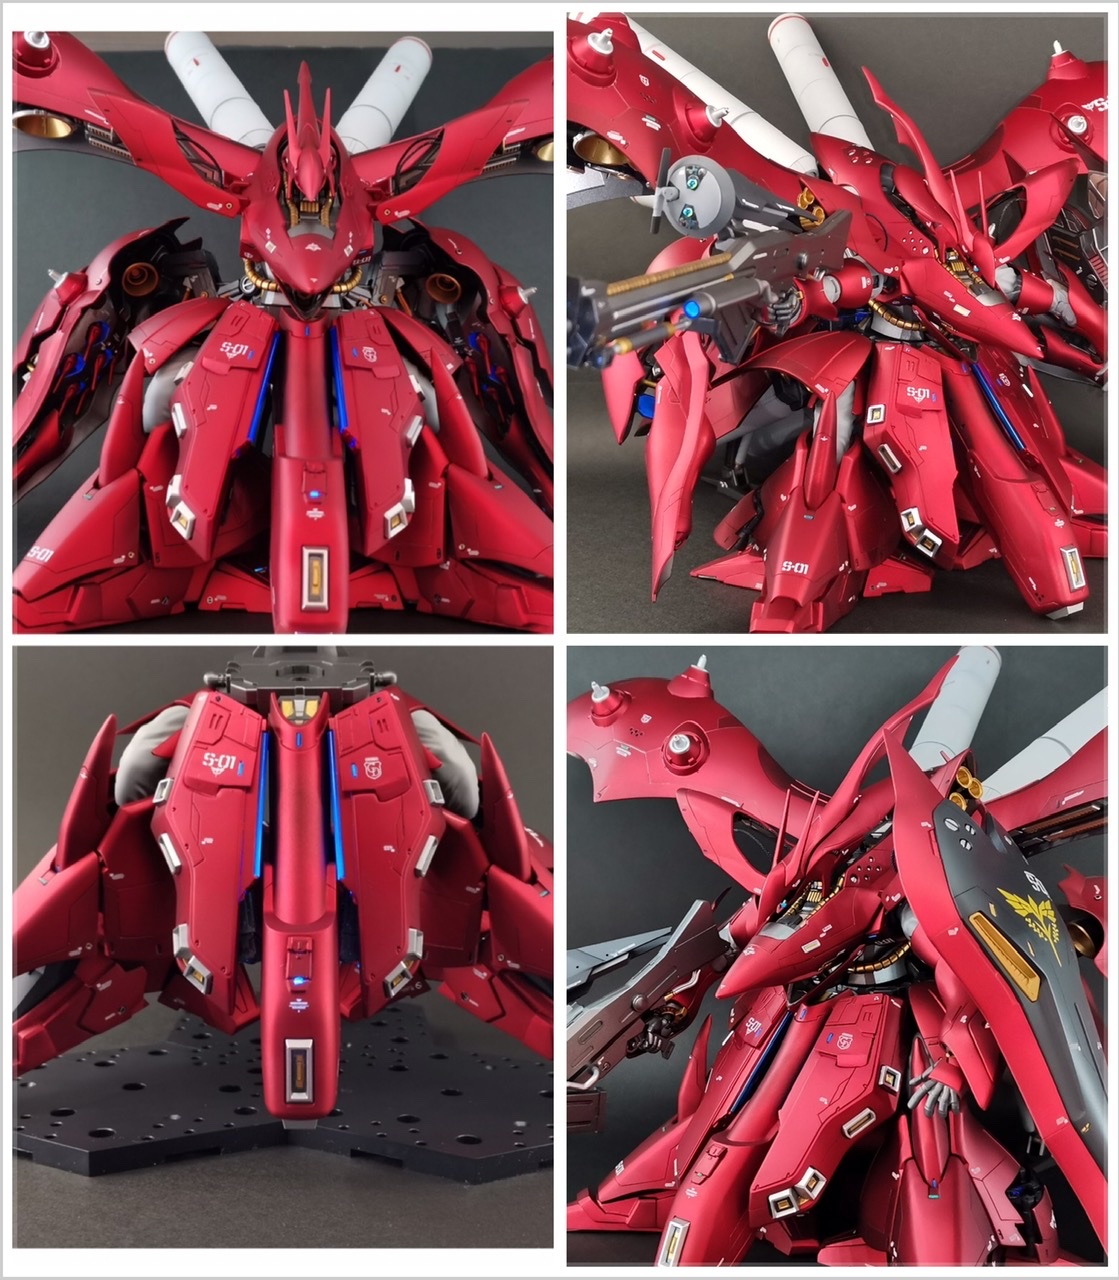
The shape of the skirt is filled with the admiration for the digital nightingale. Also, I wanted to try expressing the optical sensor attached to the front of the MG Deep Striker, so I cut a clear pipe, embedded it in a self-made part, and finished it with paint that was a mixture of fluorescent color and clear blue. .
Mono-Eye is H-Eyes, painted with fluorescent paint and clear color, and combined with 1.5mm brass dome from Haikyu parts. Compared to the head before processing (back of the first photo), the shape of the eaves has been changed using epoxy putty.
IC sockets are installed at the tip of the funnel and inside the vernier. Also, I love color chip expressions, so I carve wide lines specifically for embedding and overlap them in just the right gaps so they don’t get too noisy.
The exterior is finished with matte candy paint. In order to add light and shade to each part, the base layer is divided into Gray 2, Gray 5, EX Black, and Black Iron Color. The reflective layer is EX Silver and EX Gold, and Star Bright Iron is used only in certain areas. After layering three layers of clear red diluted with clear on top, I used glossy clear to create a protective layer to prevent the dye from bleeding into the decal, and finished with matte clear. It would have been interesting to see a temperature difference in the red color by using gold and silver separately in the reflective layer, but unfortunately I couldn’t see much of a difference in color tone.
It was my first time painting candy, but I managed to get it into shape by referring to various instructional videos and websites. I am truly grateful for the teachings of my predecessors.
The binder transplanted from Kshatriya is opened and the inside is stuffed with surplus parts, metal wires, mesh cables, etc. to make it look like the internal structure is exposed. The binder connection frame will be modified with plastic plates, wires, and color chips, and will be incorporated into the 2cm extension of the main body and rear armor. The funnel housing is overcoated with fluorescent clear to make it responsive to black light.
In order to maintain a forward-leaning posture, i have carved out an angle between the chest part and torso. The extension of the armor and forward leaning creates a considerable gap, but i used this as a great opportunity to show off, by adding surplus parts, self-made parts, spring pipes, and cables to give it a mechanical feel. This is one of my personal favorite renovations.
The propellant tank has been made larger to match the impressive body. Make sure to keep the weight down so that no load is placed on the connection parts. The paint has a slight gradation.
A radome has been added based on the MSV series motif. The radome disk is made by Bandai’s Builder’s Parts HD, the base of the unit is cut out from Kshatriya parts, and the main frame is made by myself from plastic board. I was wondering whether to buy MG Freedom ver 2.0, but when I was making it, I ended up with an unusual design. The sight lens is HIQ Parts’ VC Dome 3, and the muzzle has a mechanical pencil fitting that fits comfortably and just the right size.
The black on the surface of the shield is mainly Gray 5, and the lined carvings are painted with a 7:3 mixture of Gray 5 and dark bluish purple, but even the person himself cannot tell the difference. The back side had fewer parts and was difficult to paint, but it is now my favorite part to paint.
The beam saber was finished with a gradation of milky white clear and fluorescent paint based on Meister Sekida’s video. It’s so much fun to be able to easily get this much luminous effect without any illumination.
I was finally able to line it up next to the RG Hi-v. I’ve always wanted to do this…! I’m overwhelmed with emotion.
The HGUC Nightingale has really beautiful proportions, and as its reputation suggests, it is a wonderful kit that is worth trying and error. It is scheduled to be resold in April, so I hope it gets into the hands of those who want it.
Thank you for watching until the end.
Work by もりそば重工


