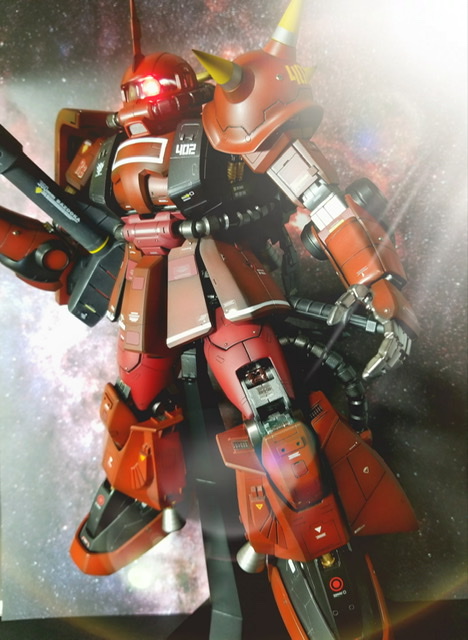
Mixing and Remodeling: PG 1/60 Johnny Ridden’s High Mobility Type Zaku II06R-2. Images, wip too, full info and credits
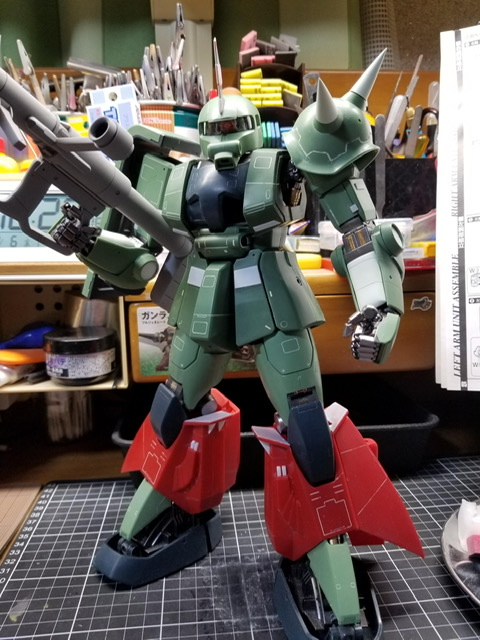
mixed PG Zaku II and old kit Johnny Ridden High Mobility Type Zaku II. In making it, I intended to take it in a direction that is not anime-like by making full use of my humble skills, which is typical of MSV, and improving the details.
back. First of all, this backpack was unusually long, so it took a lot of time to cut the tank part, cut the thruster unit, and make the vernier nozzle shine.
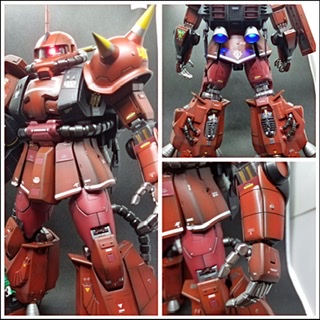
The injection wind electric decoration of the vernier nozzle looks like this. It’s a little hard to understand, but I installed a switch at the bottom center of the backpack so that I can turn it on and off without removing it. It was also difficult to connect with the power pipe in the abdomen.
From your favorite oblique top. The yellow spikes that are a feature of Johnny’s machine were short and lacked power in the kit, so I made them myself with epoxy putty. Also, the hanger-shaped parts at the top of the backpack were poor, so I processed aluminum rods and brass pipes to attach them.
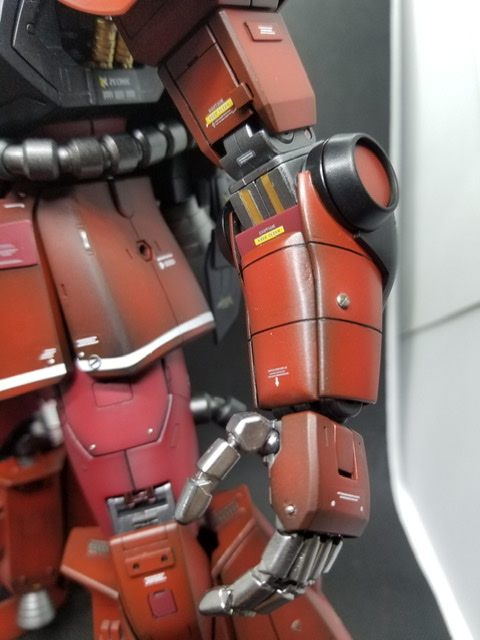
Regarding the arms, I was concerned about the forearms. In the kit, the shape was angular, so I cut off the parts once to give it strength, and put epoxy putty on it to give it volume and make it look as close to the setting as possible. Also, the round part of the elbow is cut out once and color-coded to create an atmosphere close to the setting.
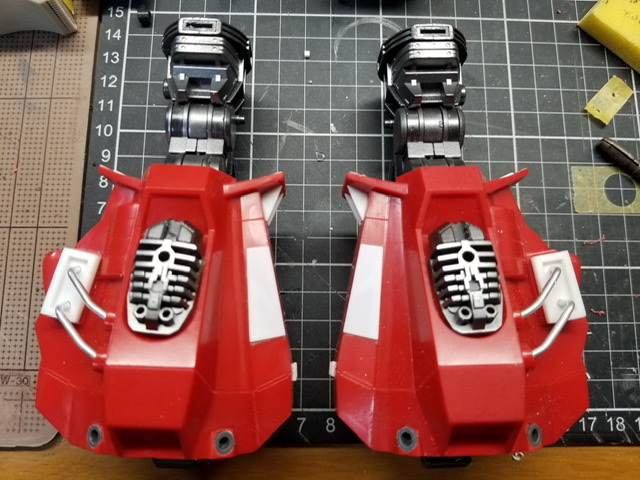
and legs. This time it took the longest. It was very difficult to match the PG here and the old kit due to lack of technology. So, it was a mistake in the first place to try to make the armor removable and make it inside even though it should have been stopped…
And inside the leg. The piping was processed with junk parts and aluminum rods, and on the 06R-1A, the front part where the tank-shaped parts were attached was pasted with surplus MG frame parts. This part is also a very important part for fixing the inner frame.
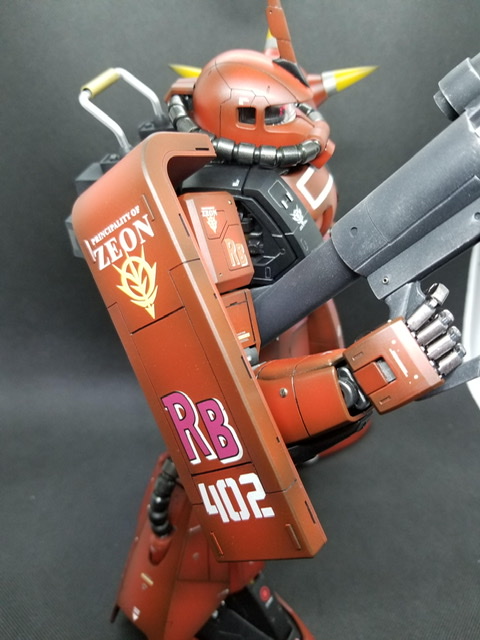
The shield also has some details, and the decals from the old kit were used as much as possible. As for the coloring, the main color is Monza Red, the sub color is mixed original red (used in Zaku I), and the black part is EX black with a small amount of olive drab. First challenge of MAX painting by raising all parts black. I wanted to give it a metallic feel, so I added a few drops of gunmetal to every color. The frame is star bright iron. Gundam Marker heavy gun metal on the manipulator, frame and some others. The vernier is star bright duralumin.
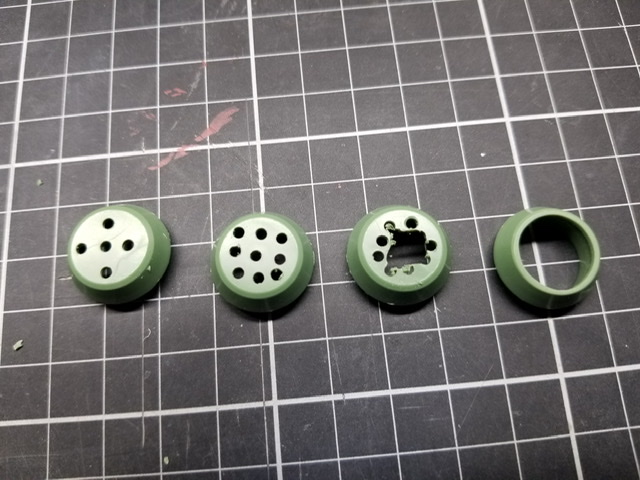
Under consideration of the inside of the leg. By the way, is the hole in the poly cap visible at the bottom the stabilizer? ,fin? for mounting. The kit is glued, but I made it movable with a ball joint.
Spike part. I made it by adding epoxy putty on the parts of the kit. Before processing on the left, after processing on the right.
This is the elbow part. As I wrote above, I cut out the round part and made it into a separate part with a plastic plate to make it easier to paint.
I put it in order of work progress from left to right for easy understanding
I didn’t like the shape of the stabilizer part of the backpack, so I scratched it off with a plastic plate. The connection parts are processed from junk.
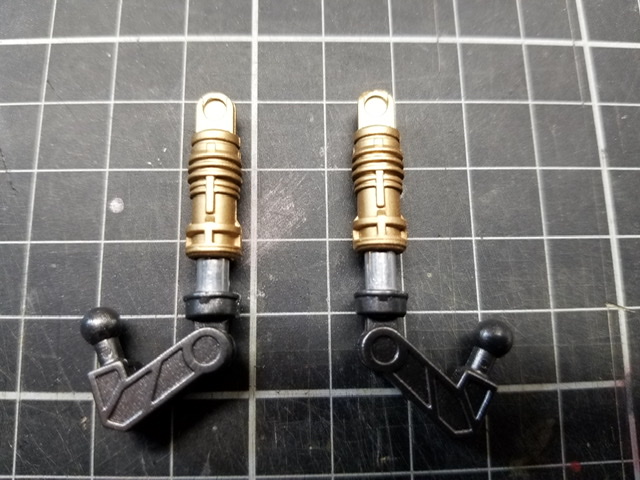
The damper parts were also integrally molded, so they were separated and made using aluminum rods.
I bought an old kit 1/60 Dom just for this bazooka
The details have been improved with reference to MG etc.
There are many points to reflect on in this production, but the fact that it took more than half a year to complete has given me some confidence. I would like to proceed with the specifications steadily in the future.
Thank you very much for reading and reading until the end.
Work by B★J
@jz08scKVbySAjsw on Twitter