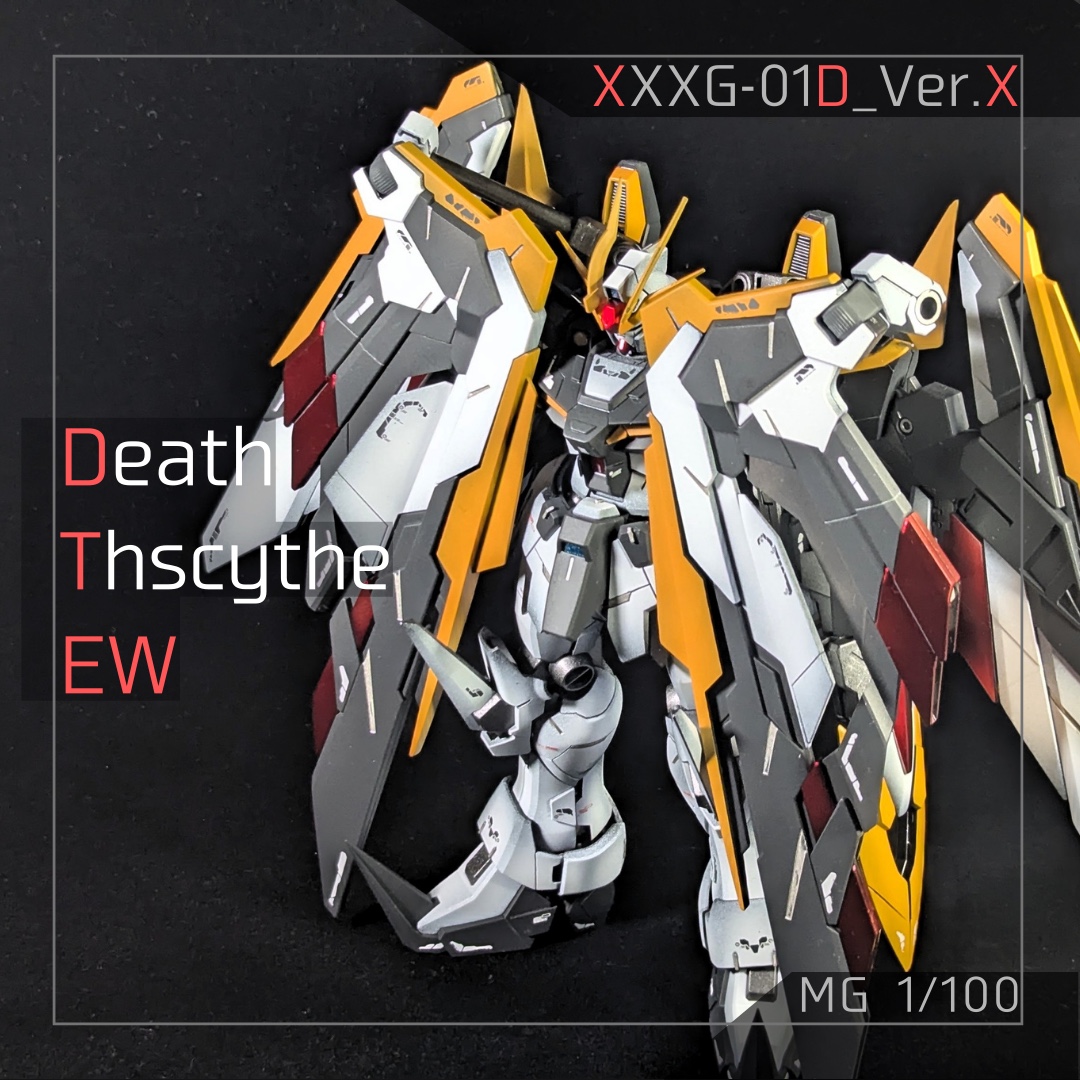
tobeafactory’s MG 1/100 Deathscythe EW Ver. X (images, full info and credits)
From the Modeler:
This time I made the DeathScythe, my favorite of the Wing Gundam series. I tried to recreate the image of the black cloak of the DeathScythe Hell (all-black unit) in the same EW version with this unit.
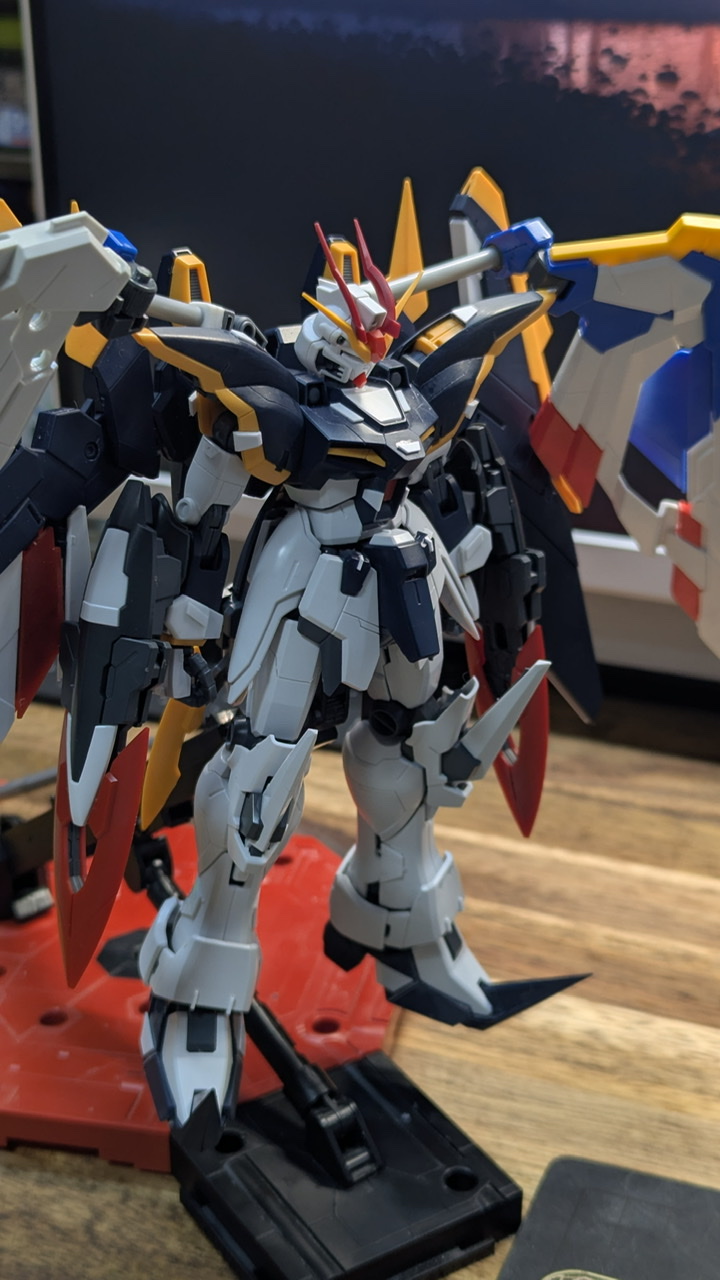
First, the whole body.
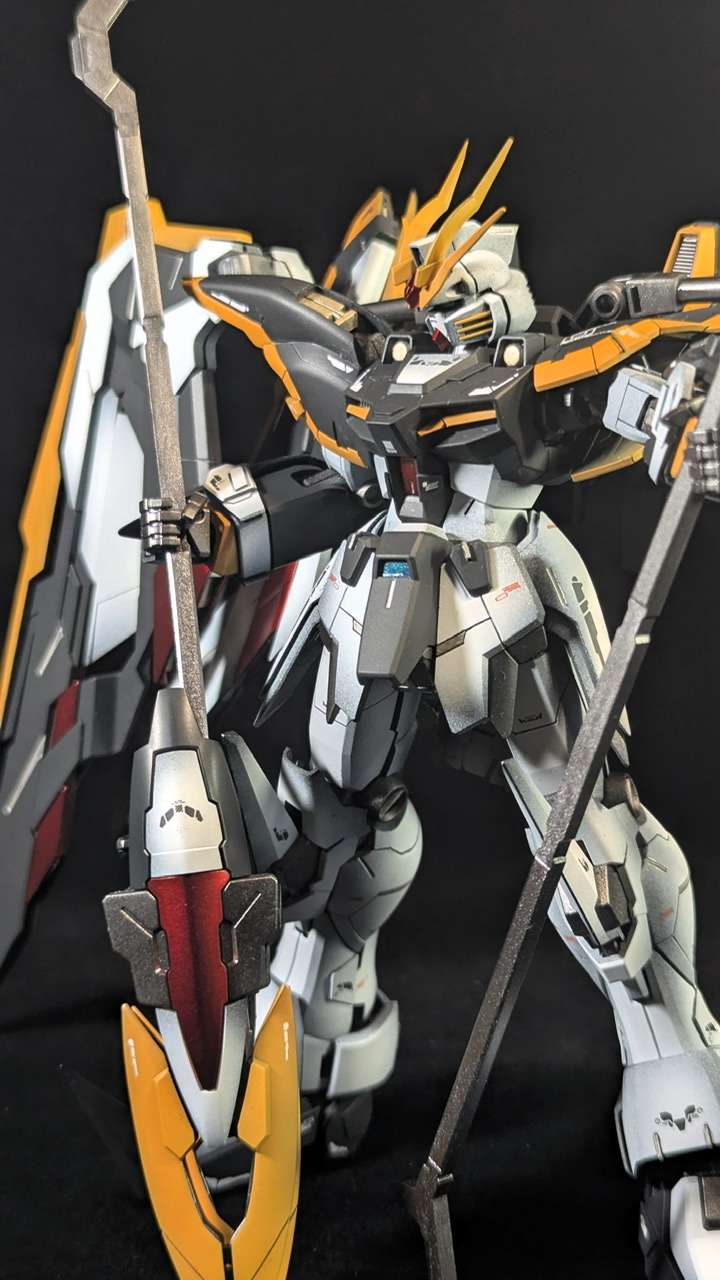
No basic style modifications were made, it is as it is in the kit. The two additional antennas were reused from the head parts of the HG Astray No Name. In addition, the “Hornet” equipped on the DeathScythe Hell (black unit) was also equipped. It is originally a weapon attached to the side armor on the waist, but the side armor was transplanted to the arm.
For the detailing, I mainly focused on the upper body and legs, and tried to add more information and three-dimensionality to the “flat” surfaces with paneling and plastic board. There are a lot of “Bandai edges” overall, so I also did some surface preparation to smooth them out.
The unfamiliar arm on the backpack is what secures the two wings on the front. It was scratch-made using plastic pipes and existing joint parts. I attached the buster shield that originally came with the kit, along with its base, to the back of the waist.
To be honest, there were three parts with the same shape as the “Hornet”, and I was wondering where to attach it, so I added more cutouts to the sides of the thighs and shins so that the internal frame could be seen. Since this is an MG, I wanted to show off the frame.
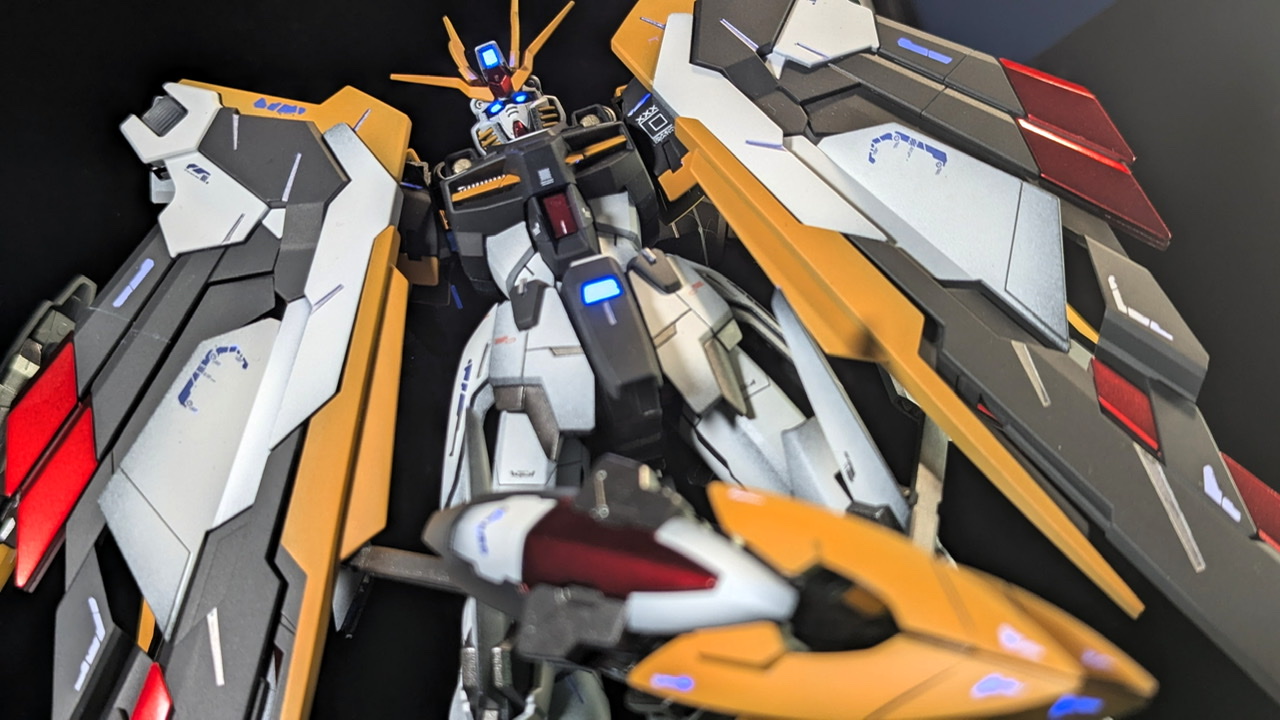
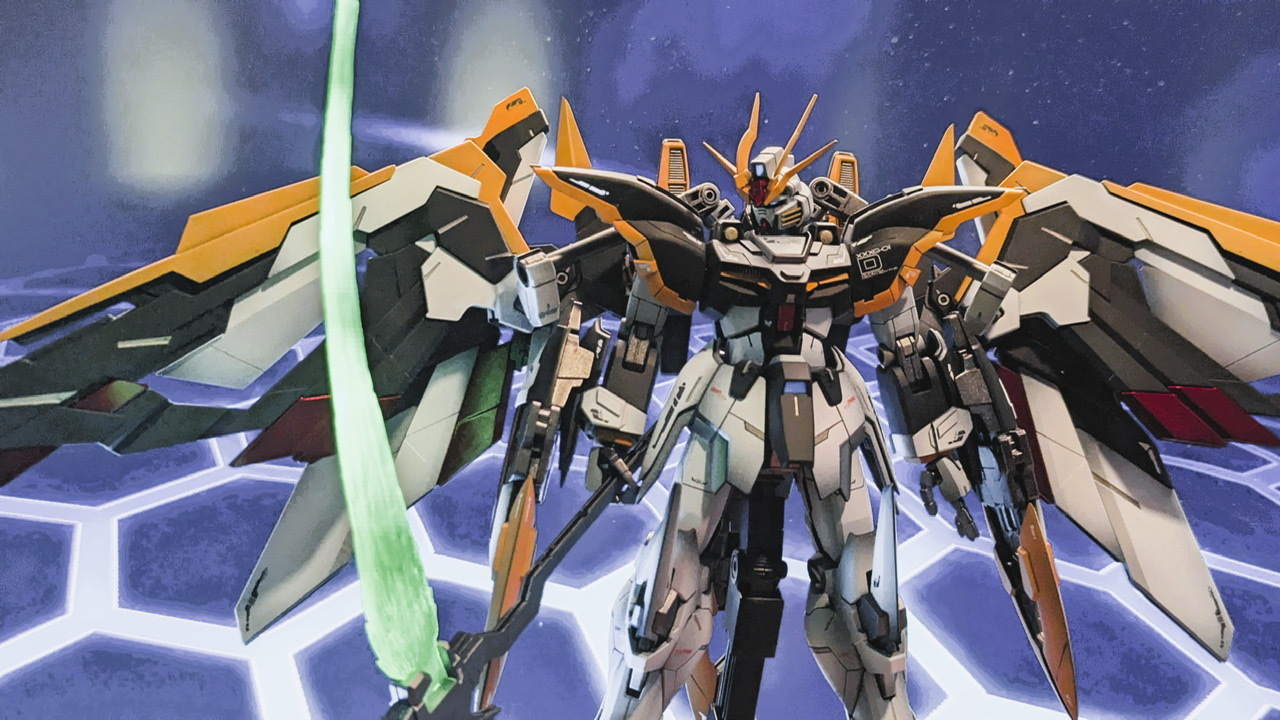
Four wings deployed. As many of you may have noticed, the added wings are from the Wing Gundam EW version (formerly known as the Early Type). Also, I felt that the arms of the original kit were lacking in volume, so I scratched the white armor on the wrists with plastic sheet. Furthermore, I cut out about half of the top of the shoulder armor to expose the internal frame.
As for the armament, I used a dual-wielding scissors with double beam scissors and three Hornets attached. It ended up being quite voluminous, and it was extremely difficult to take a photo of the dual-wielding pose… During production, I made a Gundam Fix Figuration Metal Composite There was a product introduction for Gundam Deathscythe (EW version) (G.F.F.M.C), so I used that as reference.
In terms of paint expression, the white and yellow parts were painted with a gradation paint.
Basically, I used a “black start”, and especially the backs of the parts were painted completely black. This eliminated the transparency of the plastic material, and I think it also created a visual effect of making the edges look sharp (the parts are thin).
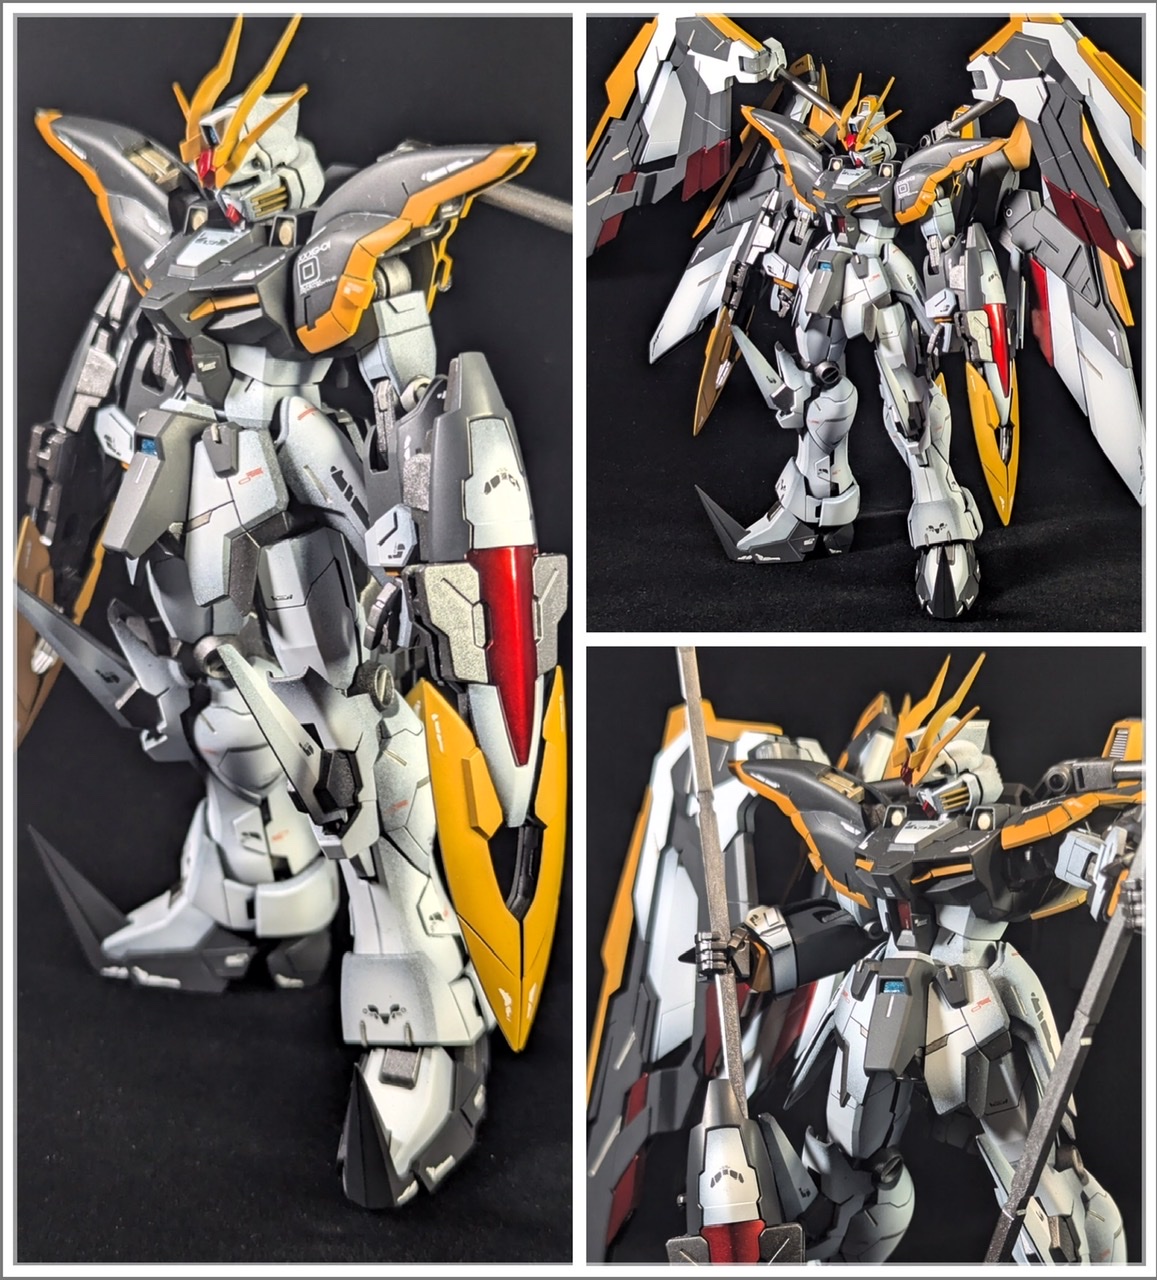
The metallic parts are semi-glossy, and the red parts are candy-painted. I usually paint everything with a uniform matte finish, but I deliberately made the gloss uneven. It has the effect of making it look more like a character figure than a weapon, so I learned a lot from this.
I still like this one with the cloak closed. The various sensor cameras were painted with metallic marker and then made to glow with fluorescent paint.
Regarding the color, I personally like the “blue” represented by the F91 series. I also chose fluorescent decals. The design also has a strong “character feel”. The small red decals are from the kit.
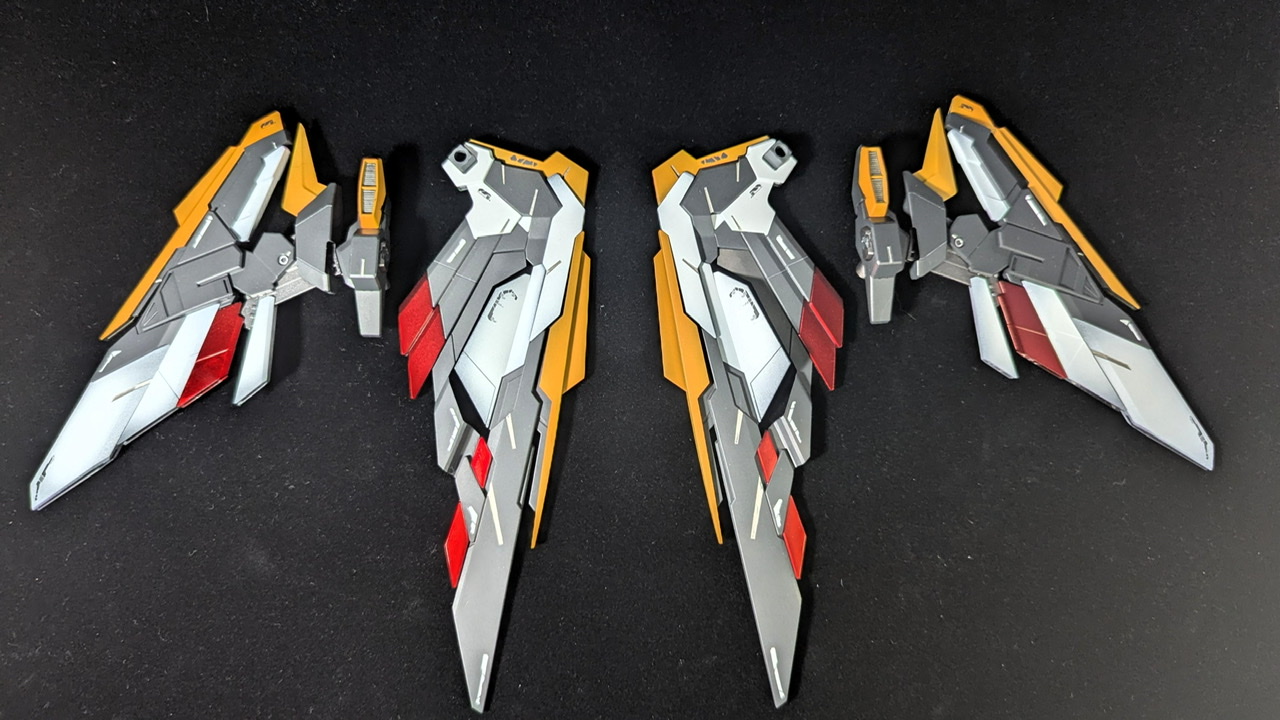
The wings of the Wing Gundam match the color scheme of the DeathScythe’s wings. There are many seams on the edges, but since it was difficult to assemble them after assembly, I left them as they were this time (I regret it a little). The concave mold was painted with a brush of titanium silver.
The weapons were made based on the G.F.F.M.C version. The connections of the three shields were scratched out with plastic material. The mounting base for the beam effect parts was also purchased from junk and installed.
The painting recipe is as follows. This time, I tried to unify the colors with Gaia colors.
* Base coat: Gaia Black primer
* Frame: Gaia Star Bright Iron
* White body: Gaia Ultimate White (plus a small amount of Creos Phthalocyanine Blue)
* Black body: Gaia German Gray
* Orange body: Gaia Pearl Vivid Orange
* Candy base coat: Gaia EX Gloss Black ⇛ Dark Stainless Silver
* Candy red: Gaia Clear Red
* Accent 1 Silver: Tamiya Titanium Silver
* Accent 2 Gold: Tamiya Titanium Gold
* Top coat: Gaia EX Flat Clear, EX Semi-Gloss Clear
The white, black, orange, and red color scheme is the popular Nu Gundam color.
Initially, I was considering a darker color scheme to take advantage of the Grim Reaper setting, but in the end, I went for the classic color scheme.
This is a photo of the work in progress. I think it’s easy to see the cutouts on the top of the shoulder armor and the scratched parts on the wrist. I think it’s also easy to see the presence of the white plastic sheet on the black part side. Adding volume to the arms gives it a more massive balance.
In this photo, I slightly changed the way the wing wings open. This looks better.
This is the first time I’ve built an MG in 20 years (it’s the first time I’ve modified and fully painted it). Compared to the HG, the parts are separated, making it easier to paint, and the style is cool enough even without any modifications. It’s also nice that the level of completion can be improved with careful construction. I named it Ver.X by combining “cloth,” which means a cloak, and “X,” which represents future possibilities.
Thankfully, it has been well-received on Instagram, which has also motivated me to make more. So, please look forward to my next work! This was tb (T-B) from tobeafactory!
Work by: tobeafactory on Instagram