RG 1/144 Sinanju STEAMPUNK Ver. Images and full description
I tried to express Sinanju with the world view of steampunk.
I was lucky enough to buy it at a fixed price, so let’s play the Sinanju Championship with my friends! Then, I decided to try a different expression than usual, and the rivets of the wave were messed up, so I want to use it as much as I want!
The concept was 3 months and the production was about 20 days.
I was also producing a diorama as usual, so please have a look until the end!
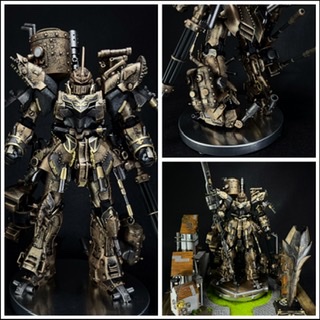
head on
One of the things I was conscious of as an expression of steampunk is the expression of metals such as copper, brass, and iron.
All from black to copper is a water-based Tamiya color dark copper, and iron is Mr. color baked iron color pomponed in the same way as sponge chipping.
I wondered if the copper part would become a steampunk world view if it was roughly pomponed and left dark. I thought it would be nice if the iron part was made finer and the iron-making technology was still sweet.
The brass was made of Gammaka red gold, the pipe part was airbrushed, and the engraving was painted on a cotton swab and carefully painted.
From the side
Steampunk expression # 2, gears.
Make the part that shows all the gears a little, place it in the gap of the parts, cut it in half with metal nippers, just attach the gears and it looks like steampunk! I was conscious of installing it so that it would have meaning one by one.
From the back
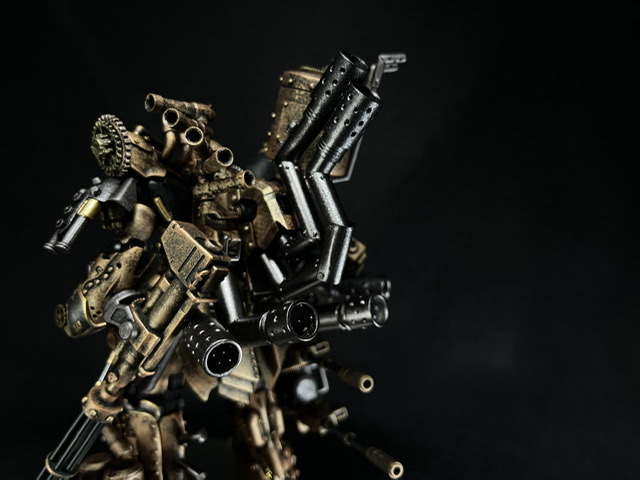
Steampunk expression # 3, pipe.
Since steam is the main power, I omitted all the power pipes, and I thought that a ridiculous amount of steam would come out because I would move this much MS, so I tried to attach as many pipes as possible.
I really like the back shot of this densely packed pipe.
Steampunk expression ④, the weapon must have a revolver mechanism, so the main weapon was semi-scratched with the image of gunlance.
I made it using a plastic board and a plastic stick based on the Kotobukiya revolver launcher.
The part below the handle was quite thin and weak, so I added a cylinder mechanism and tried to make the silhouette thicker while keeping it slender.
The balls I bought by chance at junk, such as the guns on both arms, the tank on the left foot, the double gun on the right foot, and the pipe on the heel, were very useful.
I never thought that the day would come when the ball could become part of Sinanju.
Steampunk expression No. ⑤, a pipe that crawls on the cylinder and the fuselage.
The steam generated in the main tank is distributed throughout the body, and the power of the steam is transmitted to the gears, so it is placed in various parts of the body.
Kotobukiya parts weren’t enough, so I made and added them with 2mm plastic rods and 3mm plastic pipes.
Steampunk expression [extra edition]
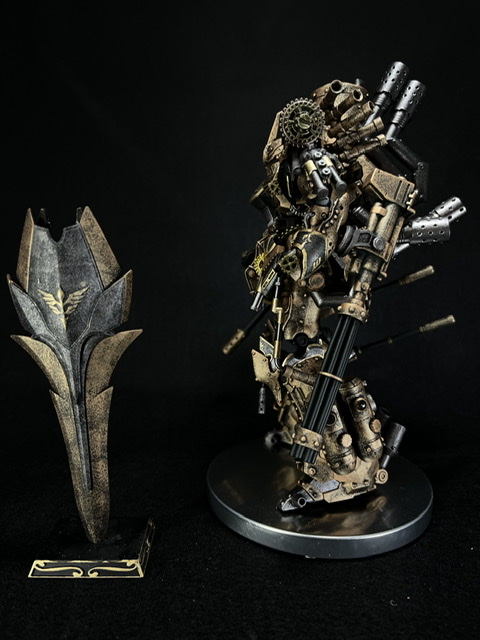
The parts on both sides of the waist have been improved in detail with the image of a plague doctor and a gas mask.
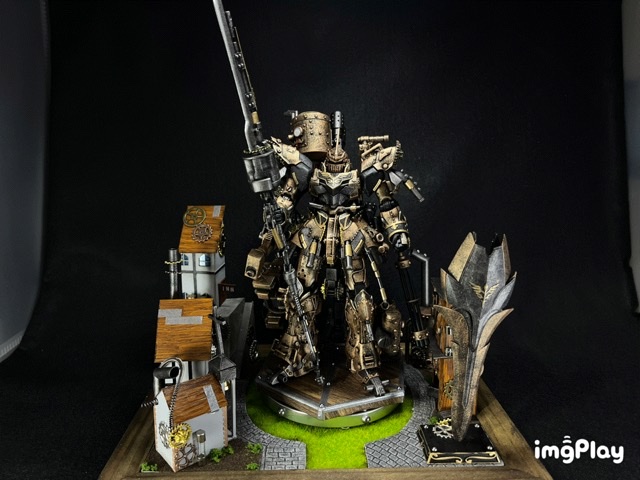
This diorama was created with the image of sitting in a city square as a steampunk city guardian deity.
In order to make the action base a part of the diorama, I put a wood grain sheet and attached gears to create an atmosphere.
The surrounding buildings were created with a box of plastic boards, and I challenged wood grain painting as a new technique.
After making wood grain with chisel or scribing needles, I sprayed a light beige-like color, brushed the weathering color stain brown in the direction of the wood grain, and sprayed clear orange to finish.
I used it for the roof and the wall of the building on the right side, but I think it felt like a tree.
Under the pedestal with the processed action base, I made a turntable with a square rotary table and a lid for a ceria accessory case, so this diorama works! (Although manually)
I like the back shots full of pipes, so I wanted to show them even after making a diorama, so I was relieved to find a way to do it.
Production process ①
When I started to remodel the tank that I used in the previous diorama instead of a backpack this time, I started making it while searching for the expression of steampunk, such as hitting rivets and attaching a meter. is not it.
You don’t need a vernier like this feather in an instant after assembling! I decided that lol
Production process ②
It’s the production of the pipe that greatly decided the direction of this work. It was difficult to adjust the angle, but since I made more than 10 pipes, large and small, I feel that I have learned a lot about the expression of bending the pipe system.
Production process ③
This time, the image was made in my head, so I was working on improving the details, remodeling, and painting for each part, such as head → torso → arm, and this is the remodeling of the waist.
The work of riveting is always fun and overkill.
Production process ④
Weapons were made with momentum while finding plastic sticks and junk parts and adjusting the diameter to fit beautifully. I like the details of the cylinder on the outside of the handle, so I’d like to continue using it.
These are the buildings that decorate the diorama.
I felt that it was fun to produce and the quality was reasonable, but I realized that I had no understanding or knowledge of the building. I wanted to see more buildings while commuting.
Work by DB