RG 1/144 Sazabi clear color ver. [Fluorescent paint] many images, info and credits
I tried the fluorescent painting of a clear color gunpla that I’ve wanted to try for a long time.
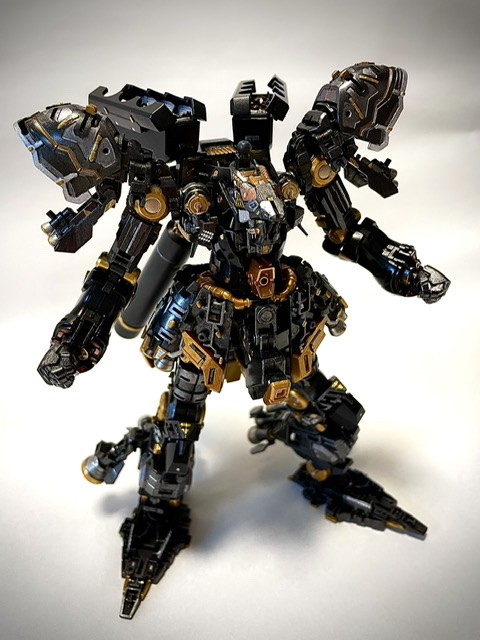
At Gundam Base Tokyo, as a result of worrying about RG Zeong, I chose RG Sazabi.
There were people who had already done the fluorescent paint of Sazabi, so I wanted to use it as a reference, but I wanted to add more effort, so I worked steadily for more than a month.
Gaia color fluorescent paint is used.
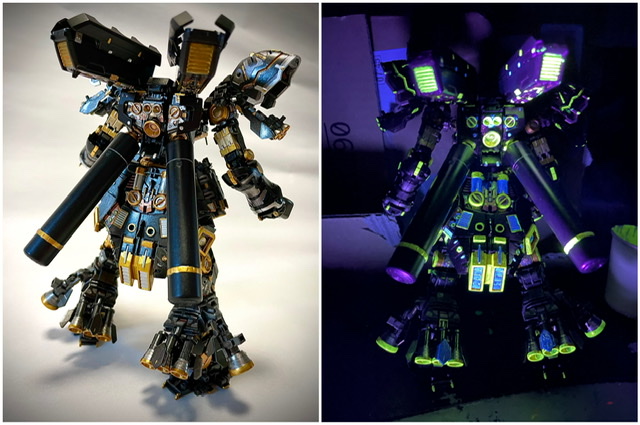
This fluorescent paint has the characteristic of being both fluorescent and clear paint, so it looks great even without a black light.
However, it seems that production has been discontinued now, and it was quite difficult to obtain it…
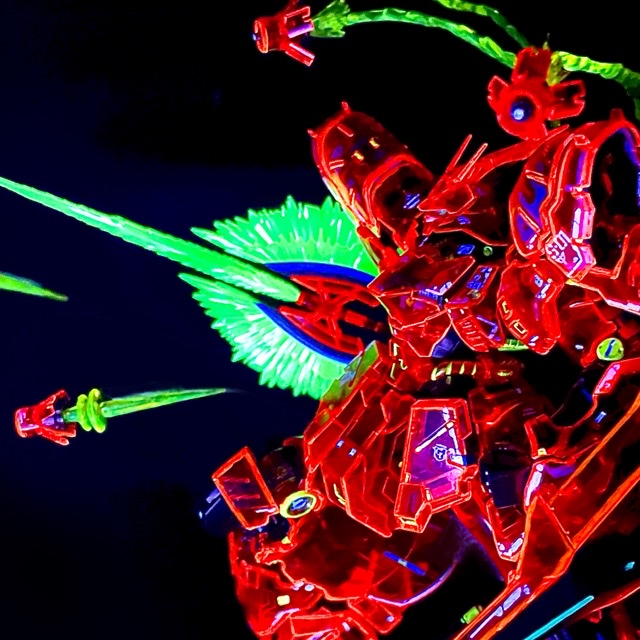
This time, in addition to the main fluorescent red, I used fluorescent yellow, fluorescent green, and fluorescent clear (normally transparent, but it glows blue when exposed to black light) to increase the amount of details.
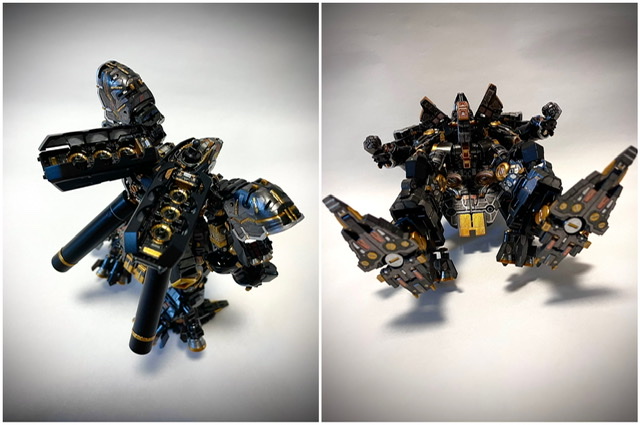
At the end of the production, I thought that the funnel was skipping… and I succeeded in flying the funnel by slightly tinkering with Bandai’s official effect parts called MS Effect 01.
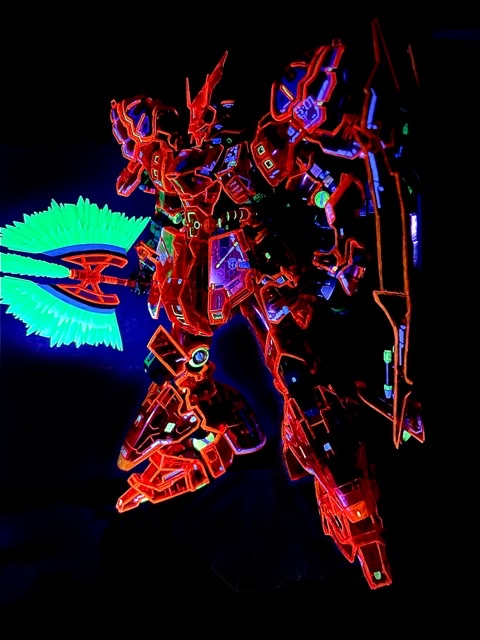
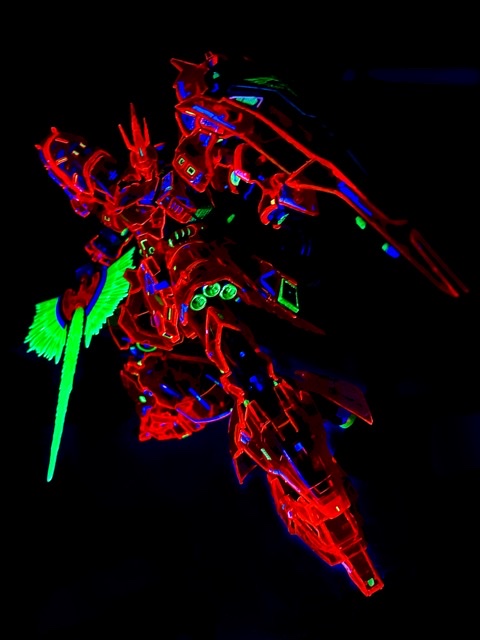
Beam Tomahawk’s effect parts are originally fluorescent, so they shine brightly.
The decals are also shining
This is made to glow by the steady work of tracing the fluorescent clear on the attached realistic decal with a brush and painting it
After all, if you apply decals, the amount of details will be different and it will be insanely cool, so if you are interested in fluorescent painting, please try painting the decals with a brush…!
All painting is done with a brush this time as well.
After all, the ease of painting is completely different from the garbage brush I have used so far, and I was able to paint fine areas without difficulty.
The edging with fluorescent red is done freehand without masking, and the lines are quite wrinkled, but on the contrary, it looks a little like an illustration, and I think that’s fine.
In addition to the main fluorescent red, the parts painted in gold are painted in fluorescent yellow, the parts painted in silver and the decals are painted in fluorescent clear (blue). .
It’s strange because a little difference in placement can suddenly make it look ugly or cool.
I changed the arrangement of the colors several times during production, and in the end I think it turned out quite nicely.
The back shot looks really good
Even the soles of the feet, if there are details, they are relentlessly painted, creating a tremendous amount of details.
It’s cool enough even without the lights on.
Even if fluorescent paint is applied, it is finished without any discomfort under normal conditions.
I tried polishing the clear parts with a compound for all parts, but honestly I don’t know if I did it properly because it was my first time doing it.
However, it is true that the transparency has increased a little, and it was a little blurry when I didn’t do anything, but after polishing, I think the transparency of the inner frame has become beautiful.
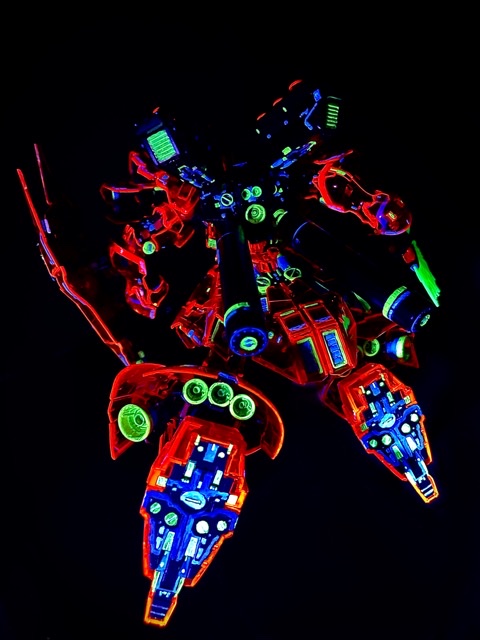
Painting the internal frame was especially difficult this time.
Anyway, I also thought about the fact that the inner frame could be seen through with the clear version, so I painted it so much that I felt like I was going crazy without compromising.
All brushed of course.
I don’t really know, but I feel like I used more than 10 kinds of paint just for the inner frame…
Finely paint from the funnel rack to the soles of the feet.
I thought many times that I didn’t need to paint that much, but I couldn’t take it anymore.
But I’m glad I did it.
Since the inner frame will also be illuminated, the painting of the inner frame, which is already difficult, has to be done almost twice with normal paint and fluorescent paint.
Since it is a clear paint, the original color is hardly lost even if it is overcoated.
Work by @Hentarou_LL (Twitter account)