DB_modeler2nd’s beautiful 1/144 Gunpla Diorama “あなたをこえたくて” images, info and of course credits
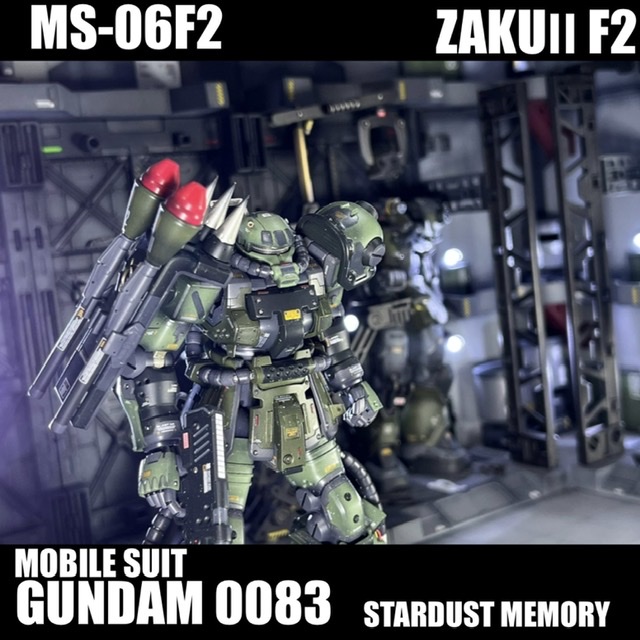
I made a diorama mainly with F2 Zaku.
The production period was two months, and I worked hard on both the MS and the diorama.
I don’t like mono-eyes, so I used a metal mesh cover this time.
I cut off the spikes on the shoulder and made a flat type one with a round mold and a flat vernier. With WAVE’s step drill, you don’t have to worry about drilling big holes.
I used Bandai’s official power pipes, and added military-style hooks to the chest and skirt. Oh, the front skirt is cut off.
The rest is streaks, spots, and metal balls all over the body.
Bandai’s official Spike Shield and Sturm Faust are included in the kit.
It’s completely a propensity, but it seems that Gatling or Sturmfaust has become a body that has to be equipped.
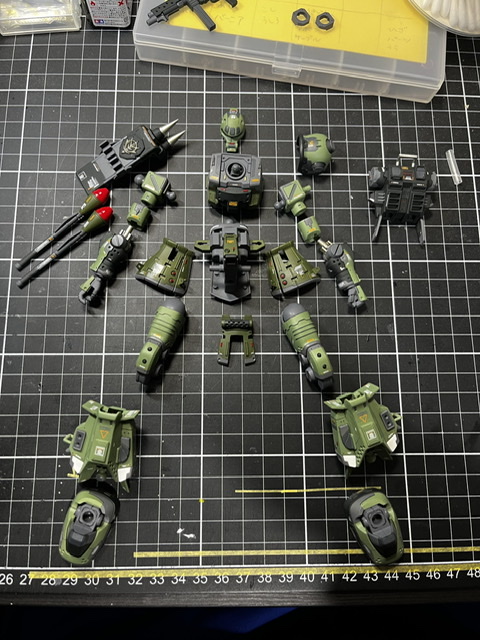
I’m in the middle of making it, but I forgot until I saw the picture. Matsunaga Zaku’s knees and F2 Zaku’s thighs are basically not connected. Since they are females with polycaps, I connected them with a plastic plate, glued around the shins and filed them.
I haven’t prepared a vacuum foam, but I have a longing for it, so at least I’m making additional armor by pasting plastic plates and scraping them.
It’s the most fun part before it’s finished.
The colors are NATO green and aircraft gray green for green, mecha saf (heavy) for gray, gray violet, German gray, and NATO black for black.
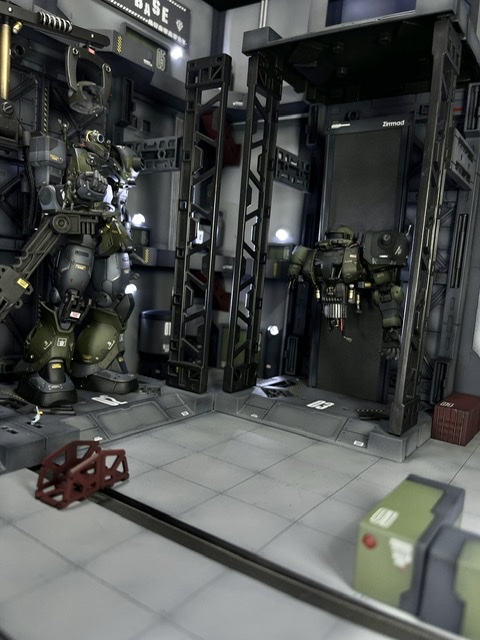
Yamada Kagaku’s display base, exhaust port, tank, Zeon mark, etc. used a little bit of detail improvement parts, but the rest is mostly plastic plate full scratch. I am indebted to Seria’s plastic board.
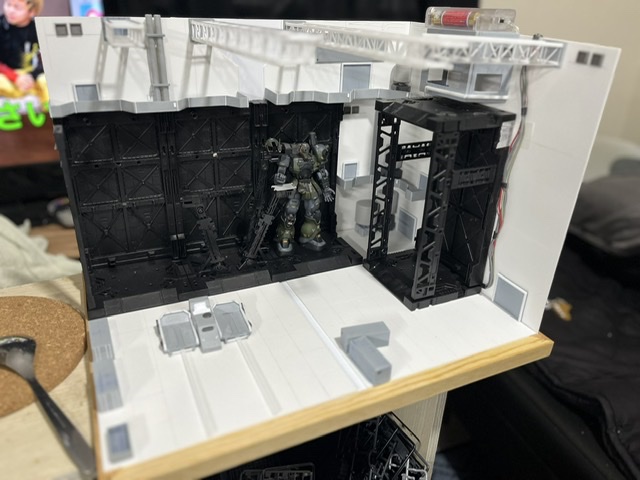
I wanted to use the display base as the main part of the diorama, and tried to keep the other parts as simple as possible without creating a big gap in terms of density and amount of information.
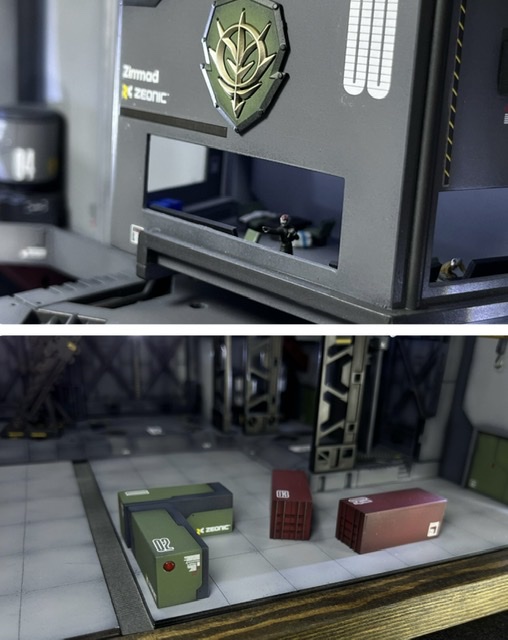
I installed Zaku 1 Sniper under maintenance and Zaku 2 which was destroyed and recovered as diorama equipment.
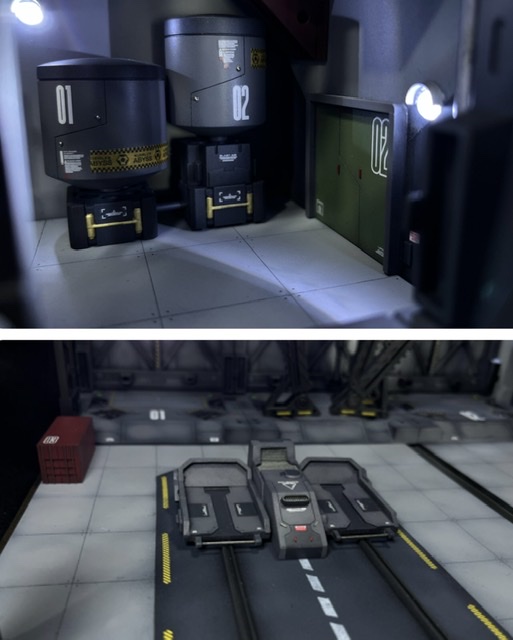
The green container is made by Zeonic, and the red one is made by Zimad.
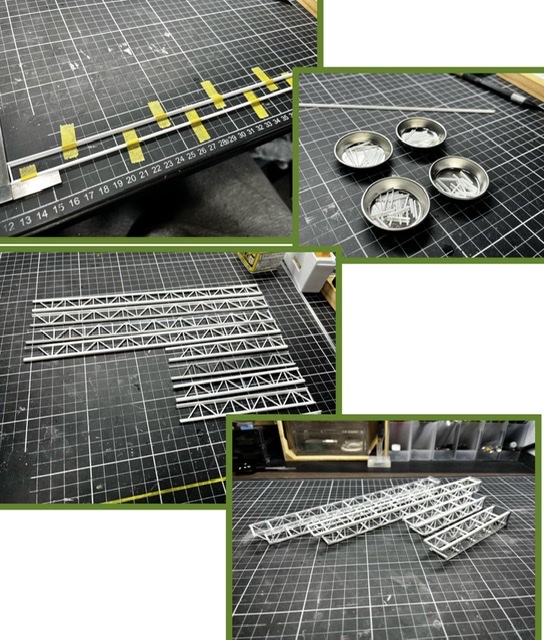
I used a 3mm L-shaped plastic bar, a 1mm square bar, and a 2mm round bar to connect the trusses.
I adjusted the width with a mask, cut out the material, and then did it.
I thought it would be austerity and tried to work on it, but it turned out to be a work I liked unexpectedly.
Product “Container”
With the introduction of the Amazing Cutter, work has become overwhelmingly easier.
I also bought God Hand’s blade, but the way the edge came out and the ease of surface preparation were different.
I secretly checked the actual container size and divided it by 144, so the scale is perfect.
For the diorama itself, I used plenty of Seria plastic plates to fill in the gaps in the base and to make the strips. I struggled with the design of the walls, and had to redo the drafts many times.
At first, I saw the sponge painting on the display base on You Tube, so I tried it, but it was so unique that I painted it black like the others. The point is that the molding color is originally black.
Work by DB
@ DB_modeler2nd on Twitter