RaMuShizu’s 1/144 Gunpla Diorama “BATTLE OF CALIFORNIA BASE” images, credits and full info
From the Modeler:
I participated in the 2023 Orazaku.
That’s why I’m proud to post this diorama.
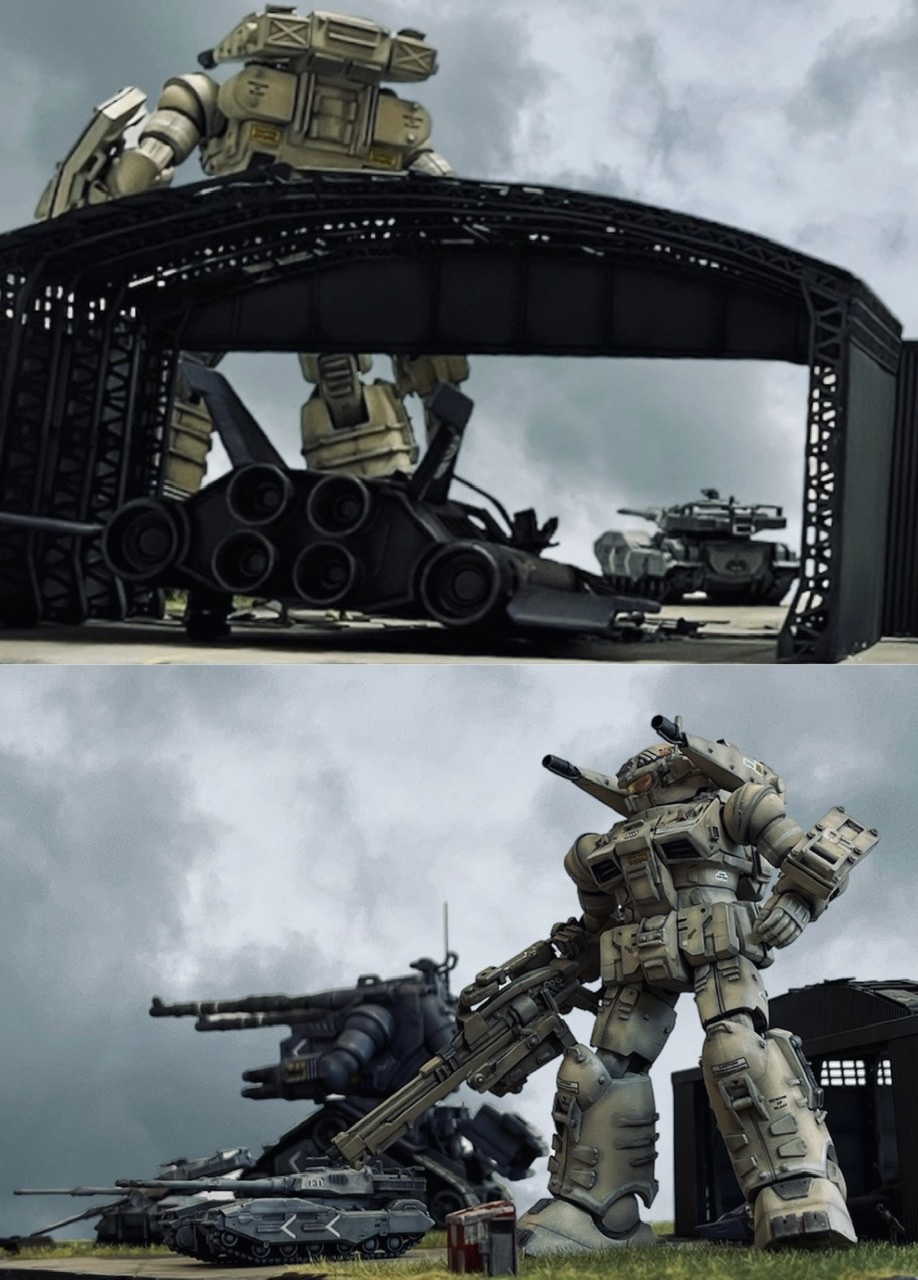
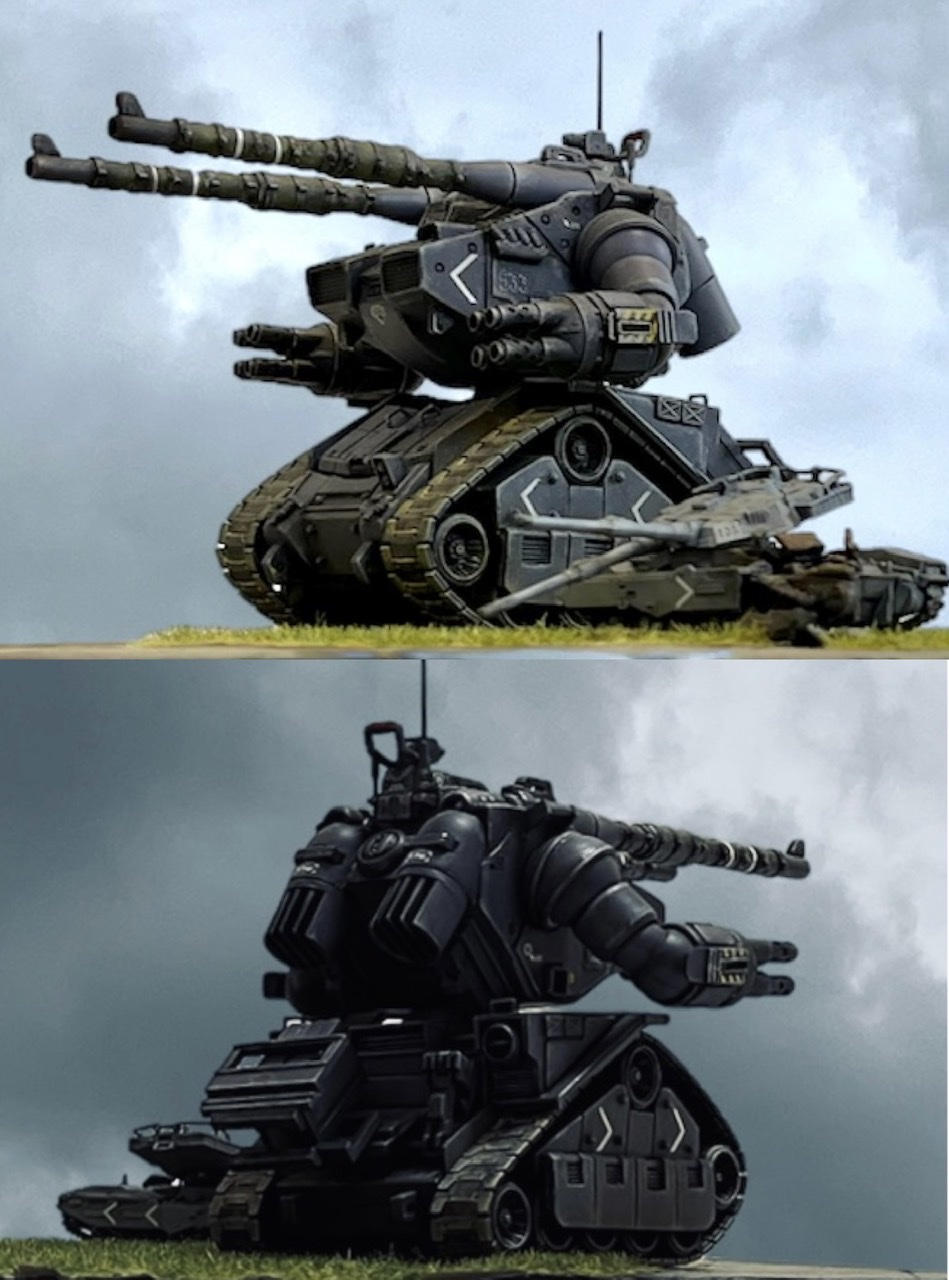
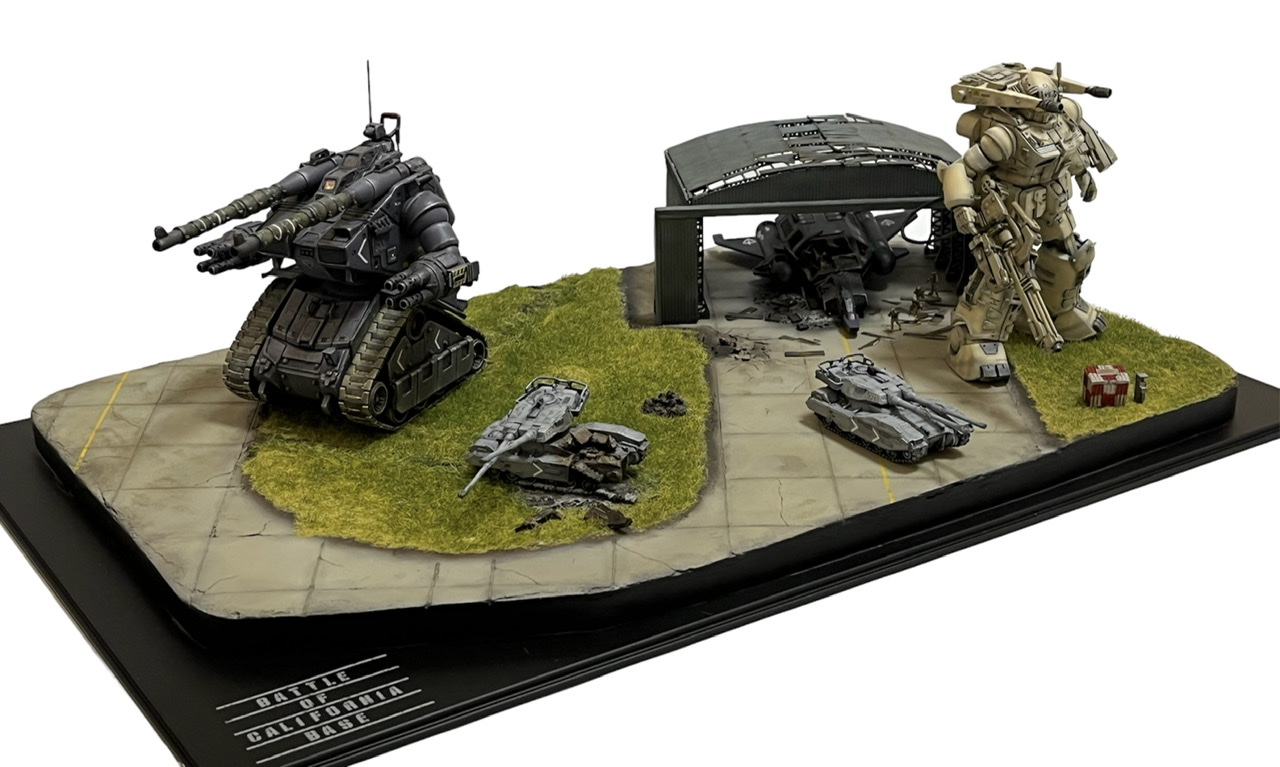
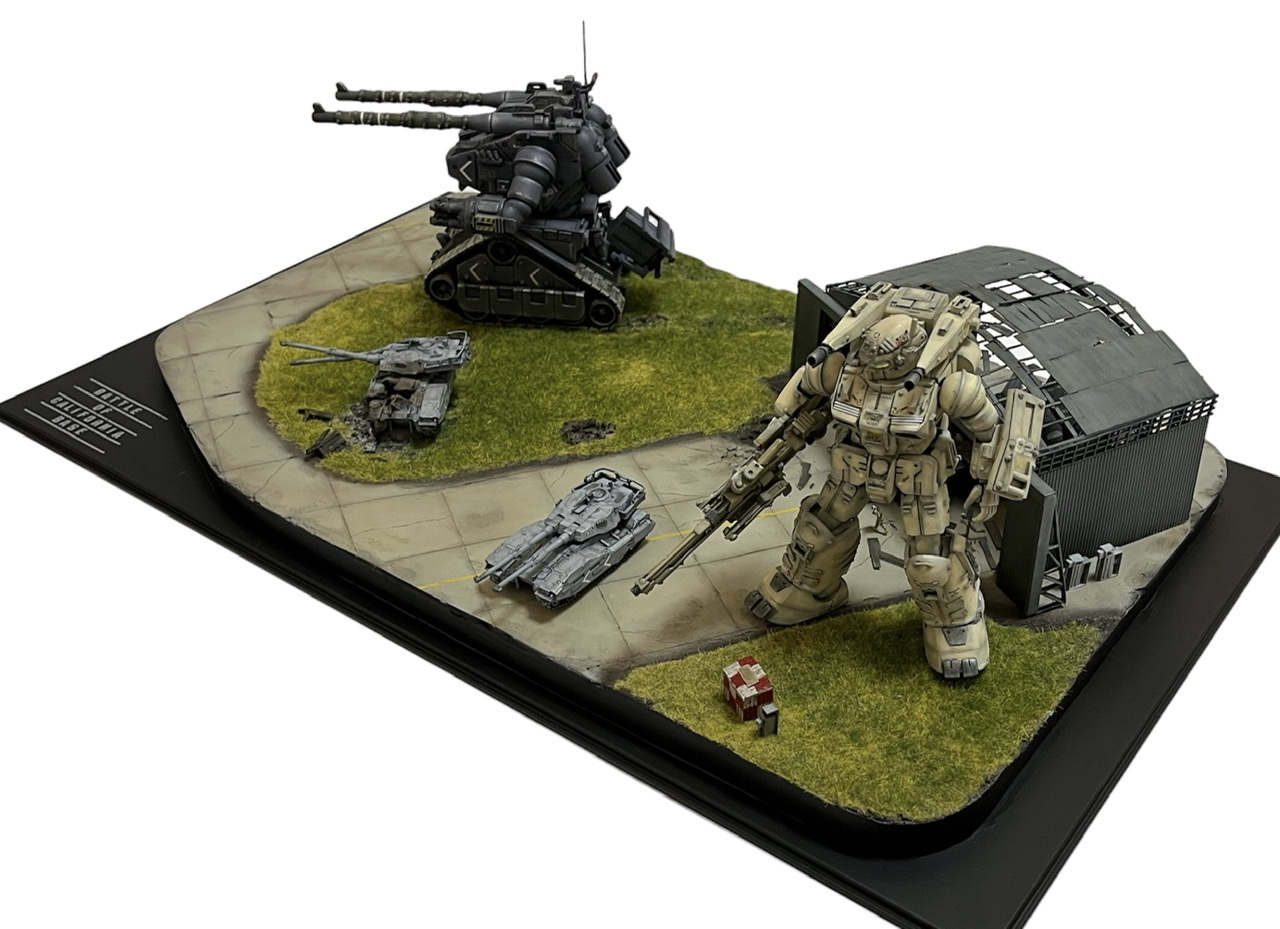
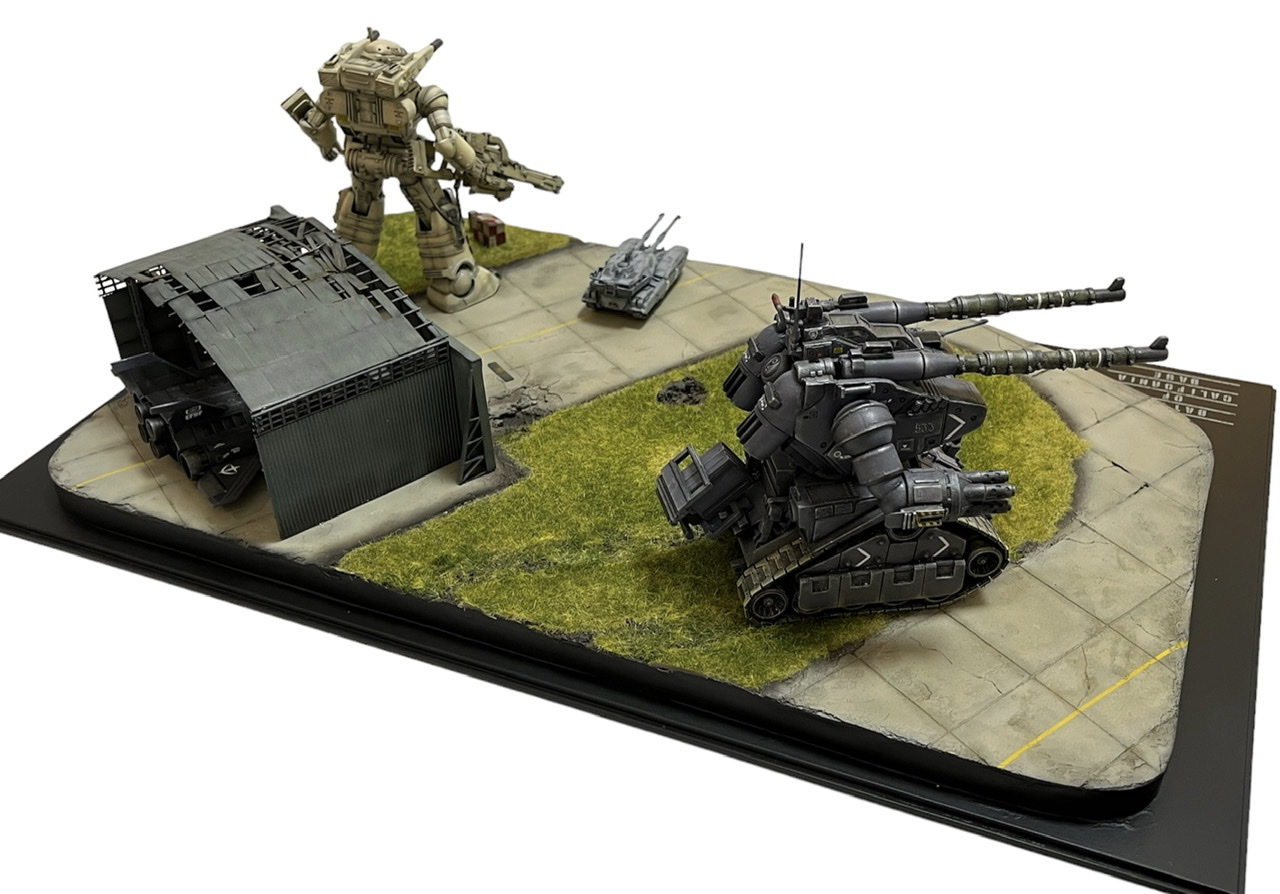
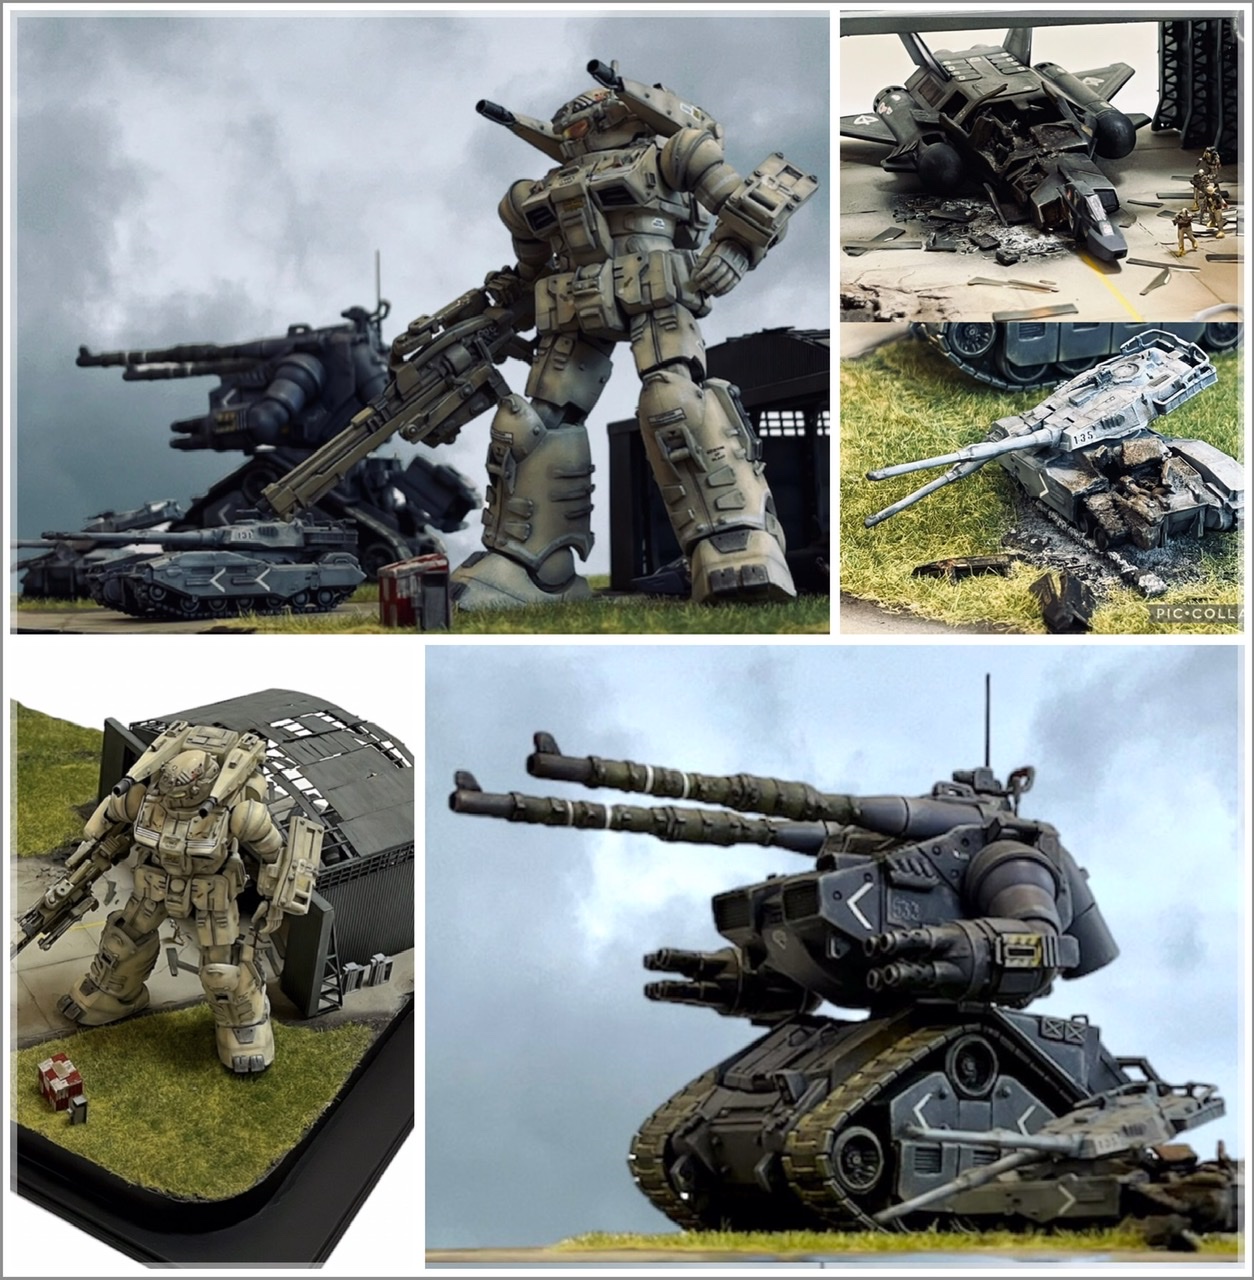
This is a diorama I made as a receiver for the Guntank and Guncannon that I made previously. I’ve been wanting to try making “airport items” for some time now. When I looked up the battle surrounding the California base on the internet, I found that (1) the troops had left the base for disaster relief after the colony was defeated, and they surrendered to Zeon bloodlessly. ②The Federation put up a thorough resistance and the garrison was destroyed. It seems that there are various theories. If you want to make it into a diorama, of course ②! That’s why I made it this time.
On March 11, Universal Century 0079, the Principality of Zeon’s forces began their invasion of North America Tailong in the Second Earth Descent Operation. A large flock of wild eagles swoop down in the desert region of inland California and march straight toward the west coast. California Base, the Earth Federation Forces’ base for weapons development, production, and Jaburo defense, had its functions degraded due to the effects of the “Colony Drop” in January of the same year, and the main force under Colonel Garma Zabi, the Western Commander, attacked it. .
Pedestal size: 300 x 500 (made of plastic) Diorama base material: Styrofoam 10mm thick + styrene board 3mm
Ground material: Wall repair material + N gauge sand powder + Woodworking bond Road surface material: Baking soda + Woodworking bond Hangar: N gauge catenary kit + plastic square material
Gunpla kit used: HG Ecopla/Guntank: HG Ecopla/Guncannon: Gravity Front Series/Type 61 tank /Federation soldier figure: Old kit/Core booster
“Military runway/grass and road surface”
I use a grass applicator to plant the lawn. It’s the same mechanism that makes your hair stand on end using static electricity. It’s a diorama with a fairly wide lawn area, so I thought it would be useful this time around, so I bought it. If you don’t check the area of static electricity before sprinkling it, the lawn will fall asleep, or if you rush and sprinkle it on top of a bedded lawn, you’ll end up spraying too much, making it difficult to correct.
I think it’s better to practice after you do it, rather than trying it out for real. I thought it was amazing when the 4mm grass stood up one by one. The finish is good so I’m glad I purchased it.
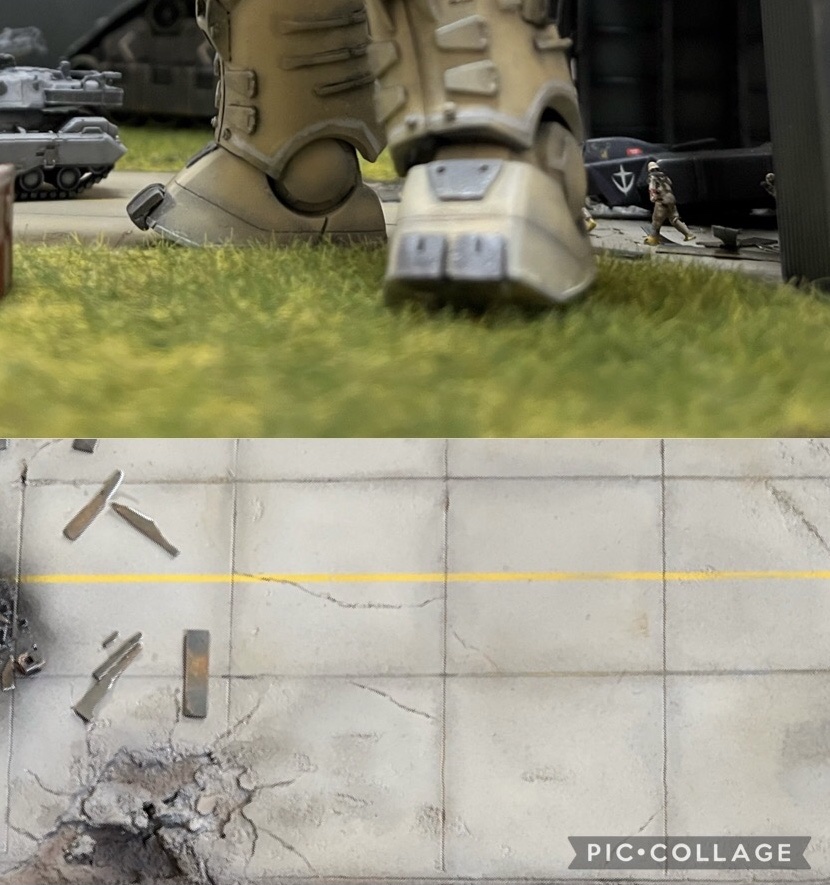
For the taxiway, I mixed baking soda and wood glue, applied it with a spatula, hardened it, and then covered it with paper to make it flat. (…)
“Battlefield-likeness”
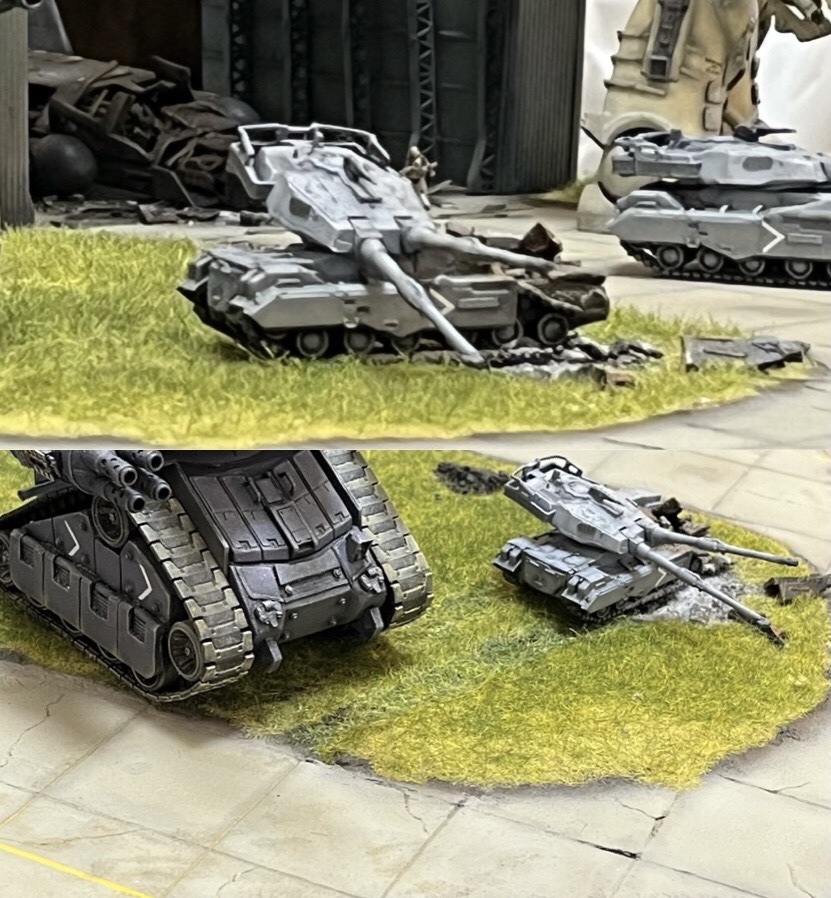
❶There are often scenes in AFV dioramas where a Tiger passes by a crashed T34. I have also made such a diorama. I wanted to see a diorama like that for Gunpla…
Since it’s an airport item, I really want to make a fighter plane crash, so I was looking for a core booster at a second-hand store, and by chance I came across the Type 61 from Gravity Front. I bought it immediately.
The expression of being hit and crushed is like inserting a nipper blade and cutting it out, or bending it and turning it up. I didn’t want to ruin my precious kit, so I was wondering how far and how I should handle it with the nippers.
It was difficult and took a long time to decide. The machinery that can be seen through the crushing port is arranged in a way that looks like junk parts, plastic pipes, and finely chopped plastic plates. The feeling of burnt metal is expressed using Tamiya’s Weathering Master.
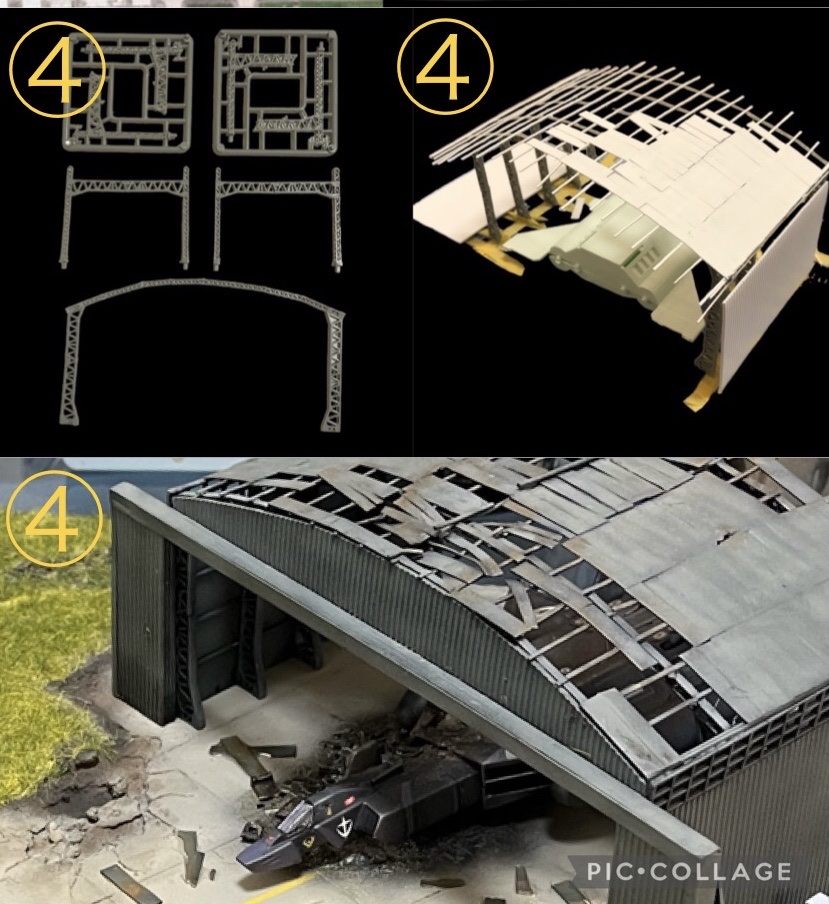
❷This is the Kadena US military base that I used as a reference this time. Where should I hollow out the vast site? It was a fun time to look at it. I also looked at Misawa Air Base and the Ukrainian Air Force Base, but all of them had hangars/bunkers separated and connected by taxiways. I guess they are trying to avoid the risk of being hit in the event of an air raid. It was interesting to see the geometric pattern of the hangar group and taxiway in the aerial photograph.
❸The title of the diorama uses the chipping decal of “Chou Sujibori-do”. Even though it was easy, I was able to decide on it with a nice touch.
❹For the hangar, I cut up his N gauge catenary kit and used it as a truss. I thought that if I could make the truss, everything else would be possible, so I was relieved when I found this kit at a model store. The roof material is blown away by the blast from the core booster that was hit.
In the first half, there is a photo of the core booster that was destroyed inside the hangar, and to create a sense of tension and scale, I placed Federation soldier figures running through the hangar. After all, it would be better to have figures in the diorama.
It’s quite long, but I hope you can get a feel for a realistic battlefield scene with this diorama. Thank you for watching until the end!
Work by RaMuShizu ⬇️